Photoshop Gurus Forum
Welcome to Photoshop Gurus forum. Register a free account today to become a member! It's completely free. Once signed in, you'll enjoy an ad-free experience and be able to participate on this site by adding your own topics and posts, as well as connect with other members through your own private inbox!
You are using an out of date browser. It may not display this or other websites correctly.
You should upgrade or use an alternative browser.
You should upgrade or use an alternative browser.
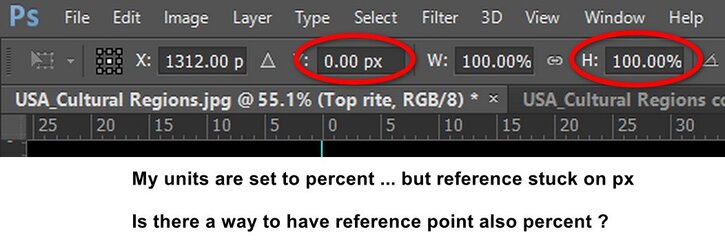
Free Transform and reference points
- Thread starter dannac
- Start date
- Messages
- 23,872
- Likes
- 13,629
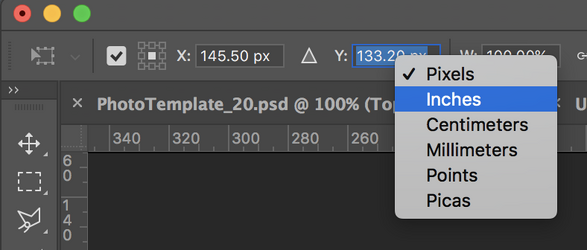
Yeah......I agree!!! I have tried everything I can to change that to percent. I've not had any success! But I will keep looking!Thought since my pref - units were set to percent, why was that stuck on px
thebestcpu
Guru
- Messages
- 3,204
- Likes
- 2,957
There are a lot of creative forum members. If you are having trouble with implementing something in an action, sometimes, if you describe what the end result you are trying to achieve, forum members might be able to provide some creative solutions or alternatives.... was trying out something with an action, and needed those references to work on percent.
Just a thought.
John Wheeler
Thanks JohnThere are a lot of creative forum members. If you are having trouble with implementing something in an action, sometimes, if you describe what the end result you are trying to achieve, forum members might be able to provide some creative solutions or alternatives.
Just a thought.
John Wheeler
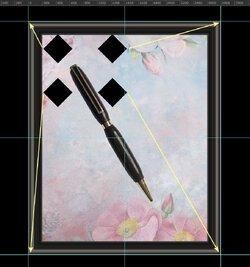
Action inserts diamond shapes onto image.
I wanted to expand that action to accurately place the diamond shapes in the 4 corners,
but needed the reference to allow “percent” so I could use it on different size images.
[ iLLuSioN ]
Power User
- Messages
- 413
- Likes
- 419
You can use the aligment function to place the shapes in the corners.I wanted to expand that action to accurately place the diamond shapes in the 4 corners,
but needed the reference to allow “percent” so I could use it on different size images.
What exactly do you need % values for? To align or to scale?
Not seeing how to use an alignment feature. What tool or you referring to ?You can use the aligment function to place the shapes in the corners.
What exactly do you need % values for? To align or to scale?
% values would have been used to align.
- Messages
- 23,872
- Likes
- 13,629
Just an idea......don't know if it will work for your needs.
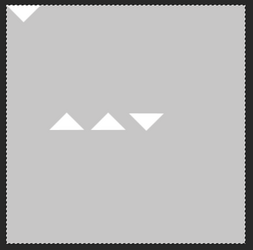
Four triangle layers, 2 up and 2 down.

Select all (Cmd + A) or select a panel.
Select a down triangle layer
Position with (Move Tool) and alignment controls
Upper left
Repeat...
Upper right
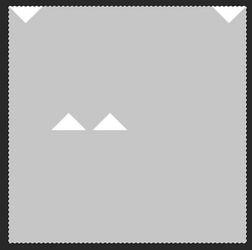
Select a up triangle layer
Position with (Move Tool) and alignment controls
Repeat
Lower left and lower right.

Cmd + D to deselect.
Four triangle layers, 2 up and 2 down.

Select all (Cmd + A) or select a panel.
Select a down triangle layer
Position with (Move Tool) and alignment controls
Upper left

Repeat...
Upper right

Select a up triangle layer
Position with (Move Tool) and alignment controls
Repeat
Lower left and lower right.

Cmd + D to deselect.
Thanks for this info and the idea on the triangles ... that will work better than what I've been using.Move Tool.
Select a layer
Cmd + A for select all.
Then use the alignment tools in the tools options bar.
View attachment 146475

thebestcpu
Guru
- Messages
- 3,204
- Likes
- 2,957
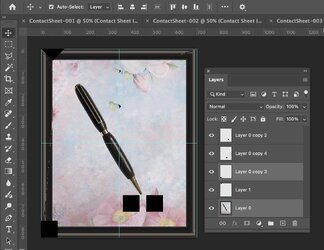
Here are some step-by-step ideas if you need to work with squares.
Start with your image and four rectangles on their own Layers
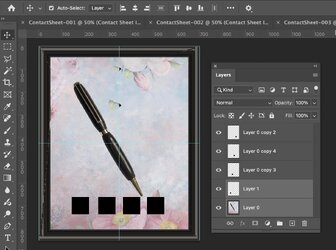
With the Picture Layer and first rectangle selected, you use the alignment tools under the move tool to shift to the left and up to the top
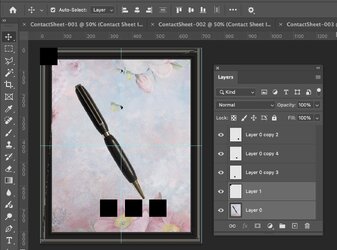
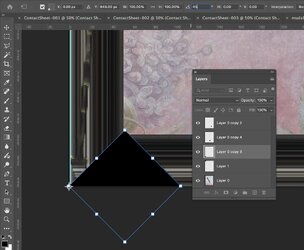
Then, with just that first move rectangle Layer selected, use the transform tool. Note that the reference point is set to the upper left corner, then rotated by -45 degrees:
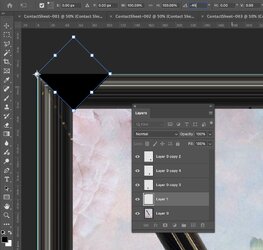
One can do the same for the next rectangle to the lower left corner. Again, with the frame Layer and the second rectangle selected, with the move tool, align to the left and then down to position in the lower left corner.
With the second square Layer selected, you transform, with the reference point being the lower left corner, and rotate 45 degrees
 .
.
Here is the image with the first two squares completed:
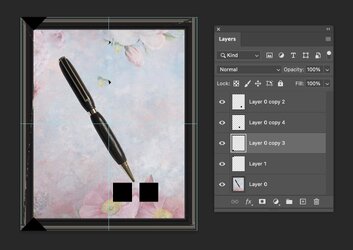
Just some more ideas to consider
John Wheeler
Start with your image and four rectangles on their own Layers

With the Picture Layer and first rectangle selected, you use the alignment tools under the move tool to shift to the left and up to the top

Then, with just that first move rectangle Layer selected, use the transform tool. Note that the reference point is set to the upper left corner, then rotated by -45 degrees:

One can do the same for the next rectangle to the lower left corner. Again, with the frame Layer and the second rectangle selected, with the move tool, align to the left and then down to position in the lower left corner.

With the second square Layer selected, you transform, with the reference point being the lower left corner, and rotate 45 degrees
 .
.Here is the image with the first two squares completed:

Just some more ideas to consider
John Wheeler
- Messages
- 23,872
- Likes
- 13,629
@dannac Another idea and just a few questions..............
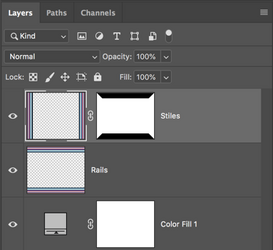
Are the frame rails and stiles on separate layers? Or do you have the (left and right) stiles together on one layer and the (top and bottom) rails together on one layer?
Are you masking the corner (45º) angles or are you deleting them?
Is the frame width always the same or do they vary? If they vary, how are you creating the corner blocks?
Are you using guides? (Guides are too easy to add, just select the layer and drag from the ruler and snap.....just make sure you have snap and snap to turned on under VIEW)
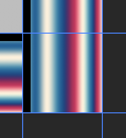
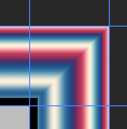
If the frame rails and stiles widths vary, you would need to make multiple actions for each width. Which also means that you have to make the corner blocks for each width. Then an action will be the best option if you are using the same frame widths all the time.
However, in the time you spend making the corner blocks, you could make a quick and easy selection at the top and bottom with the Polygonal Lasso Tool (Or Pen Tool) and the guides like this...
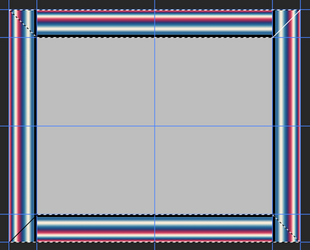
Delete or fill with black if you are using a layer mask...
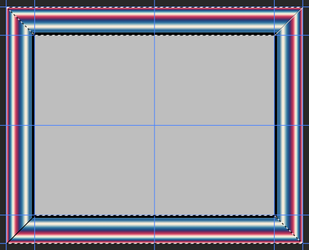
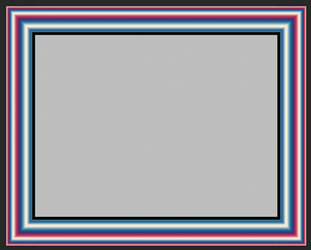
Done! Faster than making the corner blocks.
Are the frame rails and stiles on separate layers? Or do you have the (left and right) stiles together on one layer and the (top and bottom) rails together on one layer?
Are you masking the corner (45º) angles or are you deleting them?
Is the frame width always the same or do they vary? If they vary, how are you creating the corner blocks?
Are you using guides? (Guides are too easy to add, just select the layer and drag from the ruler and snap.....just make sure you have snap and snap to turned on under VIEW)


If the frame rails and stiles widths vary, you would need to make multiple actions for each width. Which also means that you have to make the corner blocks for each width. Then an action will be the best option if you are using the same frame widths all the time.
However, in the time you spend making the corner blocks, you could make a quick and easy selection at the top and bottom with the Polygonal Lasso Tool (Or Pen Tool) and the guides like this...

Delete or fill with black if you are using a layer mask...

Done! Faster than making the corner blocks.


Yes ... all separate layers@dannac Another idea and just a few questions..............
Are the frame rails and stiles on separate layers?
Masking used in cornersAre you masking the corner (45º) angles or are you deleting them?
Always the same ... 200px.Is the frame width always the same or do they vary? If they vary, how are you creating the corner blocks?
If I find the frame too large or small, I adjust the photo.
Frame colors are taken from the photo.
I like John's method for creating the blocks.
Centered and outer guides.Are you using guides? (Guides are too easy to add, just select the layer and drag from the ruler and snap.....just make sure you have snap and snap to turned on under VIEW)
This is done within the action when the canvas is expanded.
Thanks for all that info .... more idea's and I'm seeing ways to improve the action.

