What's new
Photoshop Gurus Forum

Welcome to Photoshop Gurus forum. Register a free account today to become a member! It's completely free. Once signed in, you'll enjoy an ad-free experience and be able to participate on this site by adding your own topics and posts, as well as connect with other members through your own private inbox!

Excessive grain/noise after editing in PS CS5 RAW


avz10

Active Member
Messages
26
Likes
0
I have a Canon EOS 450D and started taking photos in RAW and edited the photos afterwards with the PS RAW editing function. Often, the result on the "RAW screen" is good enough and I do not open PS CS5.

The following happened (I edited nearly 100 photos like this, but printing them was a disaster!)

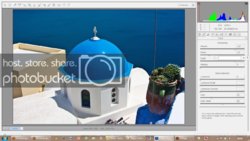
Image during editing in RAW:
Image1-6.jpg

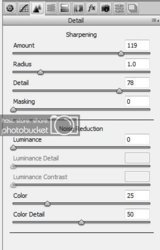
Settings:
Image9-1.jpg

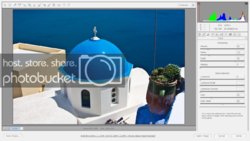
Setting under image in RAW:
Image7-1.jpg

Printing photo- a scan:
Photoscan.jpg

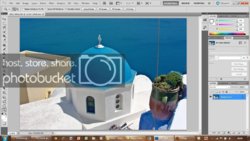
Watching the photo for the first time in PS:
Image11-2.jpg

What went wrong? Did I sharpen too much and if so, why did the picture still showed very nice on the "RAW" image?

The size of most of the photos are more than 10 MB.

I hope someone can help.
 
unusual for it to go that extreme but a raw format is exactly what the image sensor sees when taking the shot and is not made into a complete image until it is processed hence the file size is so big. When you complete processing it as an image the raw format needs to be compressed to be made recognizable ie jpeg. of course with compression you loose detail and maybe whatever file format you outputted it to cant handle that amount of sharpness. But admittedly this is the first time I have seen such a dramatic difference. also changing colour space to adobe and then to 8 bit should reduce the noise considerably but honestly from my experience your sharpness is way to high especially without any considerable noise reduction changes made
 
I don't know why it didn't show up in your preview, but it looks like your sharpening is way too high. I like that photo though, where is that.....I want to go there!
 
Way, way, way to much sharpening in ACR and unless you're viewing the image at 100% or greater you won't see the damage you're doing.
OK damage is the wrong word because you can go back and lower the sharpening in a raw image.

The default setting of 25 is usually good enough.
Once in PS you can sharpen for output.

If you're going to the web, what you have may be good enough, printing usually requires a little more sharpening and the amount depends on the printer and paper you're using.
 
Agreed that the sharpening was way too strong! You can reduce the amount of noise by using the masking slide but the problem with that is you lose detail.
 
I attach more photos- it seems as if the sharpening is really the culprit!
This is the same picture at 119 sharpening viewed with Irfanview:
Image050.jpg

A series of new pictures:

At 119 sharpening:
Image047.jpg

At 25 sharpening:
Image048.jpg

In Photoshop, at 119
Image045.jpg

In PS at 25
Image049.jpg

Irfanview at 119 sharpening:
Image051.jpg
 
Last edited:
Don't get sidetracked by what you see in Irfanview.
It's probably viewing the embedded thumbnail not the raw data.
Photoshop is giving you an accurate representation of what your final image will look like.

Other than from some minor sharpening in ACR, sharpening is always the last step of the process.
 
the result of Canon EOS 450D is not bad, but i think the picture editing more better then the current picture.
 
Last edited:
What is the best programme in your opinion to view edited photos especially to see how close they will be to printed gloss photos?

I do not print photos myself, but use a local shop.
 
What is the best programme in your opinion to view edited photos especially to see how close they will be to printed gloss photos?

Photoshop.

Photoshop is the gold standard of photo editing and viewing.

You can use PS to correct and tweak your images or misuse them and damage an image.
There is no reason to push sharpening as high as you did, you're not sharpening your degrading the image.

You sharpen for output and sharpening is the last thing you do.
Adjustments made to sharpened images can cause additional deterioration of the image.

If you have CS5 you already have everything you need you just have to learn how to use it properly.
 

Attachments

  • Sharpen.gif
    Sharpen.gif
    285.1 KB · Views: 10
  • Botanical Gardens041711_005.jpg
    Botanical Gardens041711_005.jpg
    907 KB · Views: 1
Thank you, Steve.

Two questions:
1. If I want to print pictures, the closest to what will be printed will therefore be what I see on Photoshop?
2. If I want to show a lot a photos on my laptop to friends/family- what programme will be the best and fastest to scroll from one picture to another?

Thanks again
:)
 
Photoshop's answer to proofing images for printing is View|Proof Setup.
Choose the "exact" output device or paper you'll be using and toggle that view on and off with Ctrl+Y, Cmd+Y on a Mac.
Default is Working CMYK, that's not what you want if printing it yourself.

What you need to pick is the exact paper you're printing to.
If you're using Epson "Ultra Premium Photo Paper Luster", that's what you pick from the list.
Now with Ctrl+Y toggle that preview on and off to simulate how it will look when printed.

With all that said, it doesn't do a great job, the best way is to actually print some tests and fine tune from there.
Make sure to let Photoshop handle Color Management, and to turn off all the printers color management settings.

For you're second question, I don't use other viewers so I can't help you there.
You can create a slide show in Bridge and give that to your friends.
 

Back
Top