What's new
Photoshop Gurus Forum

Welcome to Photoshop Gurus forum. Register a free account today to become a member! It's completely free. Once signed in, you'll enjoy an ad-free experience and be able to participate on this site by adding your own topics and posts, as well as connect with other members through your own private inbox!

Dodge and burn tools: actual effect on pixels


Tallsomeone

New Member
Messages
3
Likes
0
Hello all!

i am at the point of wondering what the actual mechanism is behind dodge and burn. Is it simple luminence manipulation? I hope so, but a person recently told me that the tools simply paint white and black. This can’t be! That being said, I’ve noted that even some of the most active YouTube “teachers” have misconceptions about them. For instance, one poster said that you use only the midtone setting when performing the work on a 50% gray layer, as it is working on the gray and not the photo. And so on.

Any clear facts available?

Best to all,

Jonas
 
Hi @Tallsomeone / Jonas

Without seeing which Youtube videos you watched or self learning, it is hard to give a full answer. I am also not the full blown PS expert on these topics yet can share what I know.

First though, it seems that from your comments that we are mixing up two approaches to dodge and burn and they both have different characteristics.

If you are using the dodge and burn tools in the tool bar, those work on a Pixel layer (or Layer Mask). Those tools change the values of the pixels directly and therefore is a valid or destructive process to those original pixels. Also, from my experience, with this type of dodge and burn it does not matter what colors are selected in the foreground and background color chips in the toolbar. It only matters what brush settings you have set and the options in the tool Options bar (such as range, exposure, and if the "protect tones" checkbox is checked or not.

Some do not prefer this pixel destructive approach and place a new Layer above the pixel Layer you want to modify, fill the new Layer with 50% gray and set it to Soft Light Blend mode. Then paint with lighter or darker gray tones or just use black or white with different levels of brush opacity. Darker painting than 50% gray will create something similar to burn and LIght painting that 50% gray will give something very similar to a dodging effecting. Using the soft light blend mode focues the changes around midtones. There are other blends that will focus on highlights or shadows yet that approach is used less.

All of the dodge and burn modes to the first degree attempt to keep the same Hue yet there are limits depending on the specific approach and mode.

I figure this might be a good start for you to consider asking for focused questions or asking for more details in specific areas.
Hope this helps. Other forum members may jump in with their experience as well.
John Wheeler
 
Hello Jonas and welcome to PSG.

I do apologize, but I don't have any definitive answers for you concerning the Dodge & Burn Tool. Allow me to explain further.

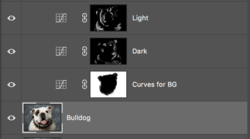
In all the years I have worked with Ps, I have little to no use for the Dodge & Burn Tools. For me, the end result they produce never looked natural so I have adopted the use of 2 curves layers with a hide all layer masks, one darkened and one lightened. I then use the Brush Tool on the layer mask to "dodge and burn" with the naturally occurring darkened or lightened colors of the original photo that I'm editing. I can control the amount being applied to the photo with the Brush Tool settings.

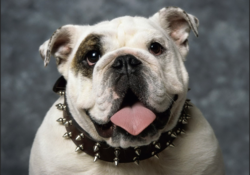
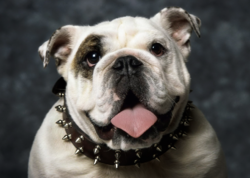
Here's an example I made in 2013....
Original image (well....a screenshot of the original!)
Screen Shot 2022-03-23 at 9.37.55 PM.png

Altered........darkened BG and dodge and burn using curves adjustment layers.
Screen Shot 2022-03-23 at 9.38.11 PM.png
Screen Shot 2022-03-23 at 9.38.24 PM.png

About the only time I ever use the actual Dodge & Burn Tools is when I'm working on something without color..........like alpha masking.
 
Hi @Tallsomeone / Jonas

Without seeing which Youtube videos you watched or self learning, it is hard to give a full answer. I am also not the full blown PS expert on these topics yet can share what I know.

First though, it seems that from your comments that we are mixing up two approaches to dodge and burn and they both have different characteristics.

If you are using the dodge and burn tools in the tool bar, those work on a Pixel layer (or Layer Mask). Those tools change the values of the pixels directly and therefore is a valid or destructive process to those original pixels. Also, from my experience, with this type of dodge and burn it does not matter what colors are selected in the foreground and background color chips in the toolbar. It only matters what brush settings you have set and the options in the tool Options bar (such as range, exposure, and if the "protect tones" checkbox is checked or not.

Some do not prefer this pixel destructive approach and place a new Layer above the pixel Layer you want to modify, fill the new Layer with 50% gray and set it to Soft Light Blend mode. Then paint with lighter or darker gray tones or just use black or white with different levels of brush opacity. Darker painting than 50% gray will create something similar to burn and LIght painting that 50% gray will give something very similar to a dodging effecting. Using the soft light blend mode focues the changes around midtones. There are other blends that will focus on highlights or shadows yet that approach is used less.

All of the dodge and burn modes to the first degree attempt to keep the same Hue yet there are limits depending on the specific approach and mode.

I figure this might be a good start for you to consider asking for focused questions or asking for more details in specific areas.
Hope this helps. Other forum members may jump in with their experience as well.
John Wheeler


Hi John! Thank you for this engaged response! My quest is to learn what the techniques do to the image. That is, I guess, me trying to see if the image is being painted over or being illuminated or de-illuminated. I think that the luminosity route might be more true. If I spray-paint half of a grand tree trunk I cover detail eventually. If I shine light on it (or shade it), I preserve its texture. So I wonder what the dodge and burn tools actually do, because they are handy.
 
Hello Jonas and welcome to PSG.

I do apologize, but I don't have any definitive answers for you concerning the Dodge & Burn Tool. Allow me to explain further.

In all the years I have worked with Ps, I have little to no use for the Dodge & Burn Tools. For me, the end result they produce never looked natural so I have adopted the use of 2 curves layers with a hide all layer masks, one darkened and one lightened. I then use the Brush Tool on the layer mask to "dodge and burn" with the naturally occurring darkened or lightened colors of the original photo that I'm editing. I can control the amount being applied to the photo with the Brush Tool settings.

Here's an example I made in 2013....
Original image (well....a screenshot of the original!)
View attachment 128263

Altered........darkened BG and dodge and burn using curves adjustment layers.
View attachment 128264
View attachment 128265

About the only time I ever use the actual Dodge & Burn Tools is when I'm working on something without color..........like alpha masking.

oh, what a spirit! Very nice. I agree with your reasoning. Do you set the adjustment layer blend modes to Luminosity? I do.
 
Do you set the adjustment layer blend modes to Luminosity? I do.
No. I did experiment early on with "luminosity", but in comparison, the lighter tones and hues seemed more natural (minutely) on the "normal" blend mode.

No matter what method, settings, or technique (50% grey layer set to overlay) one uses with the D&B Tools, the result (to me) is an unnatural discoloration of pixels. But I tend to be more critical than most........OCD.

Is is actually painting white and black or lightening/darkening the luminance? I can't really say for sure and I can't find anything on the net other than canned responses that might give us a clue! Only speculations and theory.

The only actual answer that bares weight with me lay in the results. I'm not trying to convince anyone here, just trying to show the "shortcomings" of the D&B Tool and reinforce what's already been stated.

All screenshots for what it's worth. Results will vary on individual monitors.

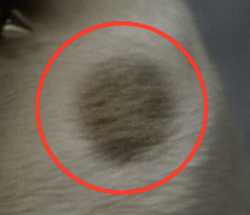
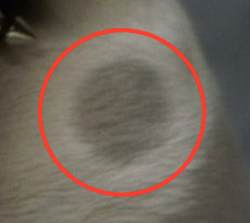
Bulldog fur.

Dodge and Burn on 50% grey layer, midtones. 50% exposure. (Wacom)
Painting the tree trunk? Starting to see loss of details.
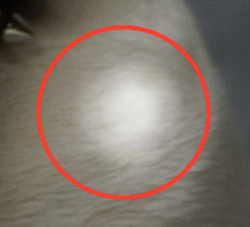
Screen Shot 2022-03-24 at 11.59.42 AM.png
Screen Shot 2022-03-24 at 10.45.49 AM.png


Brush Tool only set to "pressure for opacity" on the Wacom. Light and dark Curves adjustment layers.
I feel more like I'm shining or shading a light on the tree trunk.
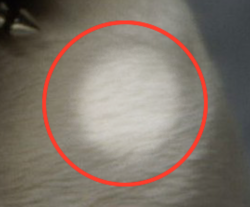
Screen Shot 2022-03-24 at 10.53.04 AM.png
Screen Shot 2022-03-24 at 10.45.57 AM.png

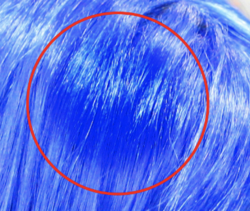
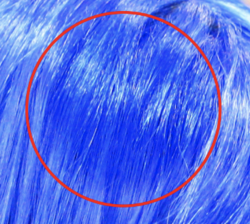
With color. Girl with crazy blue wig.

Dodge & Burn
Note the color change in the dodge! Luminance?
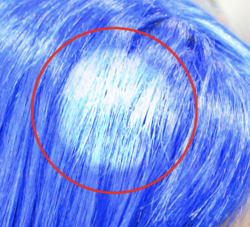
Screen Shot 2022-03-24 at 11.13.25 AM.png
Screen Shot 2022-03-24 at 11.14.47 AM.png

Curves adjustment layer.
Screen Shot 2022-03-24 at 12.23.26 PM.png
Screen Shot 2022-03-24 at 11.16.10 AM.png

My conclusion is that I really don't think the D&B Tools fall under either category that you're asking about. But if I had to lean a direction, I would say that it has less to do with luminance........but I can't offer an accurate description of what it's actually doing. If you do any luminance testing on an image, you will not get the same results as the D&B Tools provide.

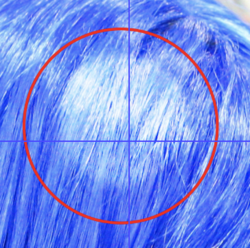
Here is the same sample area of the blue wig image with a luminosity change. No color shifting. (Even though the screen shot here in the forum has some violet that's not present in Ps)
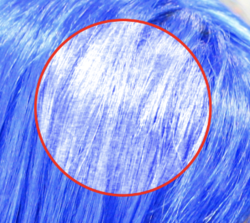
Screen Shot 2022-03-24 at 1.04.20 PM.png


The D&B Tool gives fairly decent results in a pinch as long as you use a non-destructive 50% grey layer to work on and don't go to hard with either.

However, if you are looking for much more natural results that are completely editable*, the curves adjustment layer, in my humble opinion, offers more natural results and is not really any more labor intensive.

*Even on a 50% grey layer, the only long term editing options you have with the D&B layer is to fill in the grey with the Brush Tool and re-apply the D&B, especially if you wish to change the tool settings. You also have no control over color at all.
The Cures adjustment layer can be easily be edited even years later! You can adjust color, lightness/darkness, etc., and the layer mask with the Brush Tool.

Enough rambling!!
 
Hi John! Thank you for this engaged response! My quest is to learn what the techniques do to the image. That is, I guess, me trying to see if the image is being painted over or being illuminated or de-illuminated. I think that the luminosity route might be more true. If I spray-paint half of a grand tree trunk I cover detail eventually. If I shine light on it (or shade it), I preserve its texture. So I wonder what the dodge and burn tools actually do, because they are handy.

I will first agree with IamSam about other approaches to achieve modifications in Photoshop that are non-destructive approaches.
Personally, I do a lot of work with the ACR or the Camera Raw Filter using the sliders for whole image or the adjustment brushes for selected areas. Those are all non-destructive and can be changed years later for modification without changing any pixels.

To answer your question of what is being done to the pixels, dodge and burn as akin to using the commands Image > Adjustments > Levels

The change in the pixels values is based on the existing pixels values whereas painting per se is not to the first order paying attention to the existing value of the pixels that are there. The big difference of course is that the adjustments are being done in a limited area with a brush and its brush settings.

As a specific example, using Dodge and Burn set to midtones and with the Protect Tones checkbox turned off uses the same adjustments as the Image>Adjustments>Levels command when you move the middle slider (gamma slider). Moving the gamma slider to the right creates a Burn effect and moving it to the moving it the left creates a dodge effect. Setting the gamma a .5 is identical to use the Burn tool at full exposure over the whole image and setting the gamma at 1.5 is the same as using the Dodge tool with full exposure over the whole image. You could use the Layer Mask on the Levels adjustment Layer to limit where (and how much) the dodge or burn was being done.

This description was to just give you a feel for what the dodge and burn tool is doing and hope that helps
John Wheeler
 

Back
Top