What's new
Photoshop Gurus Forum

Welcome to Photoshop Gurus forum. Register a free account today to become a member! It's completely free. Once signed in, you'll enjoy an ad-free experience and be able to participate on this site by adding your own topics and posts, as well as connect with other members through your own private inbox!

Distressing t-shirt How to subtract texture from t-shirt design for print


shanti771

Member
Messages
13
Likes
2
Help Please! I Cant figure this out.
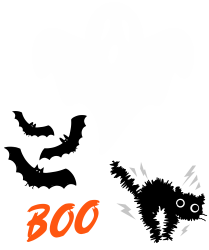
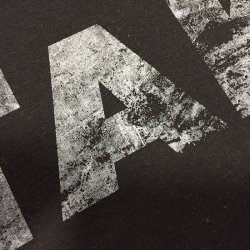
I have a PNG design for a t-shirt that I want to distress. I have a distressed texture file(just the texture no background). How do I subtract the texture from the design so there are like holes in it basically not just distressed ontop of it with color. And also preserves the transparent background.
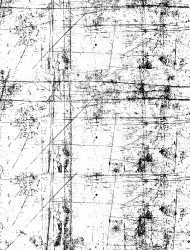
TextureGrunge.png halloween-themed-t-shirt-design-maker-featuring-a-pumpkin-silhouette-4077c.png
 
Hi @shanti771

I do not entirely understand your requirement. If you can be a bit more clearer, someone would be able to assist.

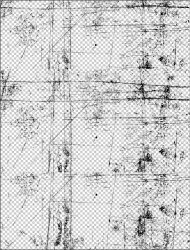
Let us call this image Texture...:
2Texture.png
...and let us call this image Design:
1Design.png

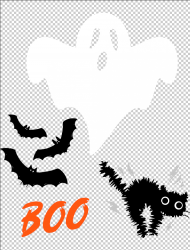
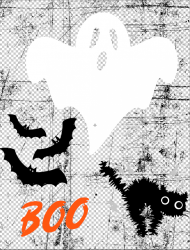
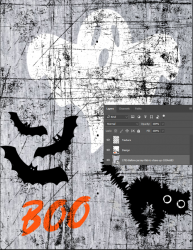
On PS layer panel, if you have Design layer on top of Texture layer, this is what will result:
3.png
4.png
How do I subtract the texture from the design so there are like holes in it basically not just distressed ontop of it with color.
Now, what do you mean by 'subtracting texture from design' and 'holes in it'? If you can, provide examples for easy understanding.
 
I want the design to have a weathered distressed look. Like this:
What I mean by subtracted is the texture layer erases the design so the T-shirt shows through in those parts.

A2F41321-71C5-47C7-989C-C3ACD3EC79AB.jpeg

F0370391-7C33-4B1C-A67B-46D35F817400.jpeg
 
What I mean by subtracted is the texture layer erases the design so the T-shirt shows through in those parts.
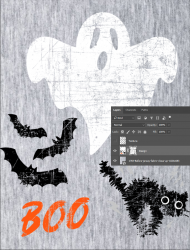
Here, the Texture layer shows through the Design layer - Since the Bats and cat are Black while the lines on Texture layer are Black, they had to be changed to White too. Also, for contrast, they had to be given an outline Stroke.
1.png

I am still unsure if I understood your requirement correctly.

If you meanT-Shirt thread textures showing through the Design layer elements, you would have to place the T-Shirt texture on top and experiment with suitable blending modes.
 
Here's my interpretation of this request:
  • Bottom layer is a plain T-shirt with its normal cotton fabric texture.
  • Next layer is the "design", consisting of bats, ghosts, etc.
  • When the OP says "subtract", I believe that means to take the distressed texture image and use it as a layer mask on the Design layer. The desired effect is that the ghost and bat designs will look as if they are worn down in certain spots, allowing the underlying T-shirt texture to show through. The worn down portions will correspond to the distressed texture.

Here's how I would do it:
  • Use the T-shirt as the bottom layer in Photoshop.
  • On a new layer, place the design elements on top of the t-shirt fabric.
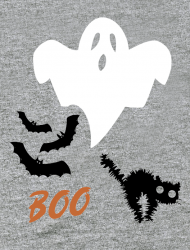
  • So far, it will look like this:
1633803870176.png

  • Place your distressed texture on a new layer above all the others. This will be a temporary layer and we will soon delete it.
  • We first need to darken the distressed texture. With the distressed layer active, type Ctrl+L to open a Levels adjustment. Move the black slider to the right, like where the red arrow is pointing. Then hit OK.
1633805047669.png

  • Activate the Magic Wand tool and make sure the "Contiguous" box is un-checked.
  • Click the magic wand on a black area of your distressed texture, which will make a selection of everything that is black.
  • While this selection is active, turn off the visibility of the distressed texture layer. Now activate your Design layer.
  • Click on the Layer Mask icon at the bottom of the layers palette. This will automatically create a layer mask using your distressed texture as the mask. However, the mask is the opposite of what you want, so as the final step, type Ctrl+i to invert the mask.
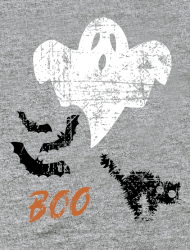
  • Here's the final result. (As an optional step, click on the layer mask and give it a very small gaussian blur—maybe 0.5 pixels—if you prefer that the worn-out areas are not so sharp and distinct.
1633805563837.png
 
Last edited:
Here's my interpretation of this request:
Thank you for interpreting the requirement Rich.

Accordingly, my approach would be thus:
Take the T-Shirt Layer at the bottom of the layer stack. Its absence is okay too, as the design would be transparent to enable it to go on any background.
Above it, have the Design layer.
Top most is the Texture layer.
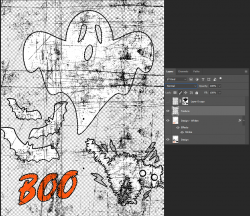
This is how the image and layer stack looks at this point in time:
1.png

Control/CMD + Click the Texture Layer thumbnail to obtain a selection of the black lines of the Texture layer.
Turn Texture layer visibility off.
Select Design Layer, Press Control/CMD + Shift + I to invert the selection we currently have.
Click on the "Add Layer Mask" icon below to Subtract the Texture layer lines from the design layer.
This is the result:
2.png

Like Rich suggested, applying Gaussian Blur rounds off the sharp edges of the Texture and gives better results. Blur was not applied on the above image.
 
@polarwoc, I didn't think of just clicking on the texture layer to create the selection. But since the distressed texture is already on a transparent background, your way is cleaner and simpler.
 
Last edited:

Back
Top