What's new
Photoshop Gurus Forum

Welcome to Photoshop Gurus forum. Register a free account today to become a member! It's completely free. Once signed in, you'll enjoy an ad-free experience and be able to participate on this site by adding your own topics and posts, as well as connect with other members through your own private inbox!

Dimensions of a pixel with mosaic image.


danedney

New Member
Messages
1
Likes
0
Hi,

Really hoping someone can help...

Can I set the dimensions of a pixel when I pixelate/mosaic an image? For use as a template to build actual mosaic(...10mm)

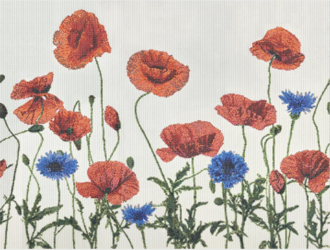
I want to put an illustrated vector image into Photoshop and pixelate it so each individual pixel is 10mm x 10mm. I then want to put printable gridlines over the top of which I have found a youtube tutorial to then print out in sections and then lay actual mosaic tiles over the top creating a pixel mosaic. please see the image attached for an example of what it looks like to give you a better understanding of what I'm trying to achieve.

When i go to pixelate image it just says change size of cell? Im confused :( (the pinker image is the one i want to pixelate...)

Screenshot 2023-04-15 at 12.56.11.png

Screenshot 2023-04-15 at 12.56.23.png
 
Here's a way to do it with some simple trial-and-error.
  • Open the image that you want to pixellate.
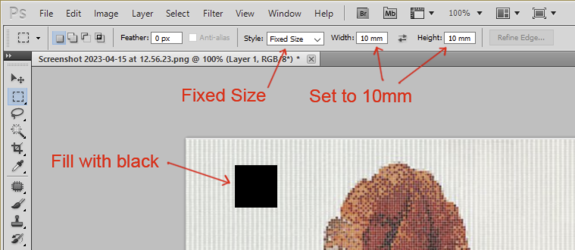
  • On a new layer, activate the Rectangular Marquee tool. Change the setting to Fixed Size and set the height and width to 10mm. (see illustration below)
  • Now create a selection with that tool and fill it with black (or any contrasting color). You now have a sample of a mosaic square of exactly 10mm.

1681578276278.png


  • Make a copy of the image you want to pixellate (keep it below the layer with your black square).
  • Convert the layer to a Smart Object. This will allow you to do trial-and-error pixellating.
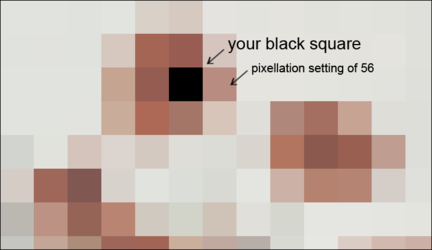
  • Go to Filter>Pixellate>Mosaic and experiment with the setting for cell size—the amount of pixellation—until the cell size matches your black square.
  • If you guess wrong, the smart object allows you to re-open the mosaic filter and change the setting as many times as you need.
  • I quickly landed on a pixellation setting of 56. See below.

1681578731770.png
 
@Rich54 had a great approach. Here is another.

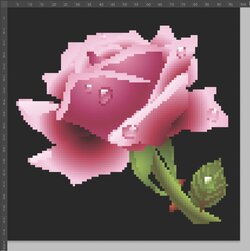
I used a vector rose as an example and assumed that with 10 x 10 mm pixels (or 1cm x 1cm pixels) that I want to make an overall mosaic of 100 squares by 100 squares which would end up being 1 meter on a side.

1) Since you want 100 square by 100 squares create a 100 pixel by 100 pixel document.
2) Place the embeded vector image into that document. Here is the vector document below.

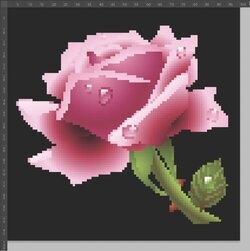
Screen Shot 2023-04-15 at 10.51.01 AM.JPG

3) After it is embedded my defaults have it come in as a Smart Object. Right Click on that Smart Object Layer and rasterize (this gives you the pixelated image at 100 pixels by 100 pixel):

Screen Shot 2023-04-15 at 11.00.18 AM.JPG


4) You now want to scale this image so you have it in mm where the whole image is 1 meter in size followed by putting in grid lines.
What you do is use File > Image Resize with the the dimensions set to "cm" the values set to 100 by 100 cm (= 1 meter final size) and set the resolution to 20 pixels per cm and MOST IMPORTANT set the resmpling to Nearest Neighbor. You will end up with this result (note I chagned the rule from pixels to cm yet other then that it is the same as the smaller pixel image:

Screen Shot 2023-04-15 at 11.00.18 AM.JPG


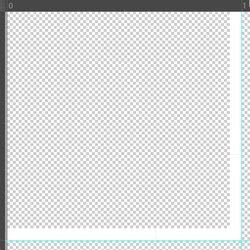
Not all you need is a grid. I did this with a pattern fill of the following pattern which is two sides with whtie 1 pixel wide in a 20x20 pixel pattern with the rest being transparent:

Screen Shot 2023-04-15 at 11.07.02 AM.JPG

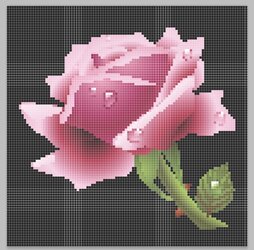
I then create a fill on a separate Layer using this pattern to create a grid that is 1 cm on a size with a white grid that is one pixel wide:

Screen Shot 2023-04-15 at 11.13.18 AM.JPG

And your are done. You can print sections of this image to scale and use that for your pattern to put in the tiles

Just another way to approach the problem.
Hope this helps
John Wheeler
 

Back
Top