- Messages
- 23,872
- Likes
- 13,629
Ok, for this first installment we are just going to cover the very basics of how I paint hair.
For this tut, I will only use the Brush Tool, no special brushes, and black and white as my pallet.
I'm using a Wacom Intuos tablet.
My basic brush settings for the hair brush are:
Mode: Normal
Opacity: 100%
Flow: 100%
I have the Pressure for Opacity Icon set to ON.
I have the Pressure for Size Icon set to ON.
Hardness: 85%
Spacing: 1%
Size: 5px
(note: Of course you will have to change the brush size occasionally.)
As I have stated before, hair is built up in layers starting from the furthest hair away from the viewer which is called background hair.
Next, comes the midground hair.
And lastly the foreground hair.
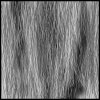
Here I block in the basic hair. I have no specific pattern I need to follow, it's just random.
The darker areas will be the background hairs that receive the least light.

Next I want to lay in some of the darker background hairs.

I then begin adding in the white hairs.
I switch back and forth between white and black layering in the background hairs and building the foreground hairs.
I'm using different pen pressures on the pen so I have some hairs lighter than others. It's very difficult to explain how and when to vary the opacity, it's a matter of practice.

The process continues until I have darkened the shadowed areas and built up midground hairs.
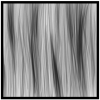
With the midground developed, it's time to lay in the foreground hairs, accentuate the highlighted areas by building up with lighter hairs.
Note that the foreground hairs are laid over the darker shadow areas, this adds depth.
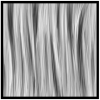
And finally comes the straggly detail hairs. I usually lower the brush size to 3px or 4px for this.
And that's most of the basics. I'm certain I've missed some details so ask any questions if you have them.

Next, I will cover how to paint hair that's in a specific pattern as you would find in a photo reference.
For this tut, I will only use the Brush Tool, no special brushes, and black and white as my pallet.
I'm using a Wacom Intuos tablet.
My basic brush settings for the hair brush are:
Mode: Normal
Opacity: 100%
Flow: 100%
I have the Pressure for Opacity Icon set to ON.
I have the Pressure for Size Icon set to ON.
Hardness: 85%
Spacing: 1%
Size: 5px
(note: Of course you will have to change the brush size occasionally.)
As I have stated before, hair is built up in layers starting from the furthest hair away from the viewer which is called background hair.
Next, comes the midground hair.
And lastly the foreground hair.
Here I block in the basic hair. I have no specific pattern I need to follow, it's just random.
The darker areas will be the background hairs that receive the least light.

Next I want to lay in some of the darker background hairs.

I then begin adding in the white hairs.
I switch back and forth between white and black layering in the background hairs and building the foreground hairs.
I'm using different pen pressures on the pen so I have some hairs lighter than others. It's very difficult to explain how and when to vary the opacity, it's a matter of practice.

The process continues until I have darkened the shadowed areas and built up midground hairs.

With the midground developed, it's time to lay in the foreground hairs, accentuate the highlighted areas by building up with lighter hairs.
Note that the foreground hairs are laid over the darker shadow areas, this adds depth.

And finally comes the straggly detail hairs. I usually lower the brush size to 3px or 4px for this.
And that's most of the basics. I'm certain I've missed some details so ask any questions if you have them.

Next, I will cover how to paint hair that's in a specific pattern as you would find in a photo reference.


