What's new
Photoshop Gurus Forum

Welcome to Photoshop Gurus forum. Register a free account today to become a member! It's completely free. Once signed in, you'll enjoy an ad-free experience and be able to participate on this site by adding your own topics and posts, as well as connect with other members through your own private inbox!

Cutting out an image to put on a black background (Help)


^Photographer

Active Member
Messages
30
Likes
4
This is the image I would like to have on a black background. The hair is an issue and I have tried all sorts of tutorials on cutting out hair etc. I have not been able to do it either using channels or the various quick selection tools. Obviously I am doing something wrong.
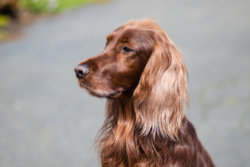
IMG_0711.jpg

Has anybody have a work flow that may work for me. I've spent hours searching YouTube etc and every trick and workflow I've tried fails. Especially difficult is the hair on the top off his head and along his chest.

Any help or ideas/links would be appreciated!
 
A very simple fix used to give you something until someone with real skill arrives. The background is solid enough to use Image>Adjustments>Replace Color in Photoshop and change the grey to black. Then a layer mask to remove the change in the dog.
IMG_0711EDIT.jpgIt leaves some grey in the fur at places, though.
 
Well than you but I guess I'm a complete idiot. I have sent ghpurs on this and can't make it work trying to follow the instuerctions step by step.

In your suggestion you say to go to image> adjustments> Replace Color and change the gray to black. I thought I did that but when I hit OK nothing changes! :(

You have a screen shot or something?
 
Screen shot wouldn't help. I didn't know you have PS to use, so I'll give you all steps.

The procedure is to 1) duplicate the layer, 2) on the new layer> Image>adjustments>Replace color, 3) click the eyedropper in the grey area, 4) in the pop-up, move the Lightness slider to the far left. This darkens the grey to black. Paint over that upper left corner with black.

Since your background is grey, and there's black and grey in the dog's coat, this will add unwanted black to the dog's coat. To remove that,
make that layer a Layer Mask and use the brush set to black (remove) to erase the effect on the dog. The lighter coat will then be visible. A little care in the edges is required with a small very soft brush. You'll get a little halo effect that can be corrected in the Layer Mask by going over the edges.

A tip for future photographs...When you know the end result will be a cut-out like this, use a background that is easy to remove. My kit includes a couple of yards of bright green cloth and a couple of yards of sky blue cloth purchased from a fabric shop. Green would have been good here as a background since there's no green in the dog. No Layer Mask treatment would have been required. It's similar to using a Chroma Green process, but cheaper than buying the program and a dedicated Chroma Green background. Place the background well back from the subject and use a wide open lens so the detail of the fabric isn't picked up.

Try the above and let us know how it works for you.
 
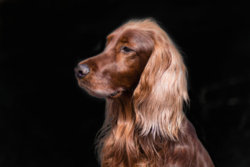
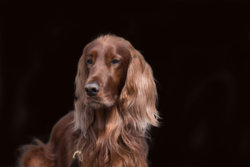
I used a little different technique but seems to work pretty good. Need to practice and refine the technique.

What do you think?

IMG_0713.jpg
 
It's a good job. It would be better though, for you to explain your "different technique".

There are three type of people who appear in this group:

1) Those have no skills at all in PS, or don't have access to the program, and want something done for them.

2) Those who have superior skills and could "write the book" on PS techniques.

3) Those who have moderate skills and like to learn new techniques and how people employ them.

I'm in Group 3. If there's a different technique, I'd like to learn how to do it.
 
OK...well here is what I did.

First I duplicated the background layer and then made a selection of the dog with the Quick Selection Tool going very slow to avoid selecting the outer edges of the photo which PS seems to want to do very easily. :(

Then I clicked the Select and Mask button and used the refine edge brush tool to go over the hair and bring out anything that was missed in the selection. I also clicked the Smart Radius button but am not sure if that really did anything. Maybe it did.

Then I went to Select > Inverse and then used a brush with black selected to brush over the entire image which made the background black except for the dog since the selection was inverted. Deleted the selection and saved as jpeg.

Maybe not the best way too do it and like I said I have to figure out how to get better at brining out the fine hair but that is what i did.

And BTW, I am in category 1) -- I have very little skill in PS but am trying to learn. I know enough to be dangerous but this masking stuff is difficult for me,
 

Back
Top