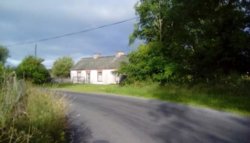
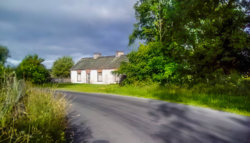
#thebestcpu
A perfect work for me. Incredible! Could you explain ?
Sure
- I started with using Topaz AI GigaPixel to enlarge the image 6X. It is hit or miss on how well it works yet was decent on this image
- Brought into PS, turned the Layer into a Smart Object and used the Camera Raw filter in a variety of adjustments to the image
-- I used the spot removal tool for the telephone line and a pole in the image
-- I increased the contrast, greatly reduced the highlights, increased clarity and also the saturation (also increased the shadows)
-- In HSL panel I slight increase the blues slider to be a bit more blue (the sky) and also reduced the saturation some to taste
- Back to PS, added blank Layer and used the Vanishing Point filter to clone out the bedframe and clone in the left window using the right side of the building as reference
- Another blank Layer and cloned in grass along the bottom of left side of building
- Another blank Layer to clean up the sky a bit with healing brush and between the two trees to the left of the building
- I actually posted at this point yet went back to change the left window to look less cloned. I moved what appears to be a shade or ? moved it up higher, changed the left edge of the window to look visually different, and healed some areas in the window and around the window to look somewhat different that the right window area. Just enough difference to it would not catch the eye as well.
Topaz AI Gigapixel created some artifacts in the image that I did not pursue e.g. it made things sharper in some areas yet trees in positions in similar focal planes were not as sharp which would not be normal. However, given the state of the original image, I decided that such defects could be chaulked up to the original image having issues. Creating false detetail where it did not exist with AI has its pros and cons.
Hope this gives you an idea of the most of the steps I took
John Wheeler


