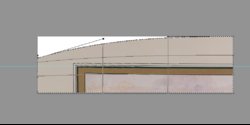
I have a high-res TIFF file scanned from an old print and I would like to have it printed so I can frame it. However, the document that was scanned was stored rolled-up, so when it was opened up to scan it wasn't completely flat. As a result, the top corners show a "rolled" effect (see attached pictures). Any suggestions for how I can correct this in Photoshop?
Photoshop Gurus Forum
Welcome to Photoshop Gurus forum. Register a free account today to become a member! It's completely free. Once signed in, you'll enjoy an ad-free experience and be able to participate on this site by adding your own topics and posts, as well as connect with other members through your own private inbox!
You are using an out of date browser. It may not display this or other websites correctly.
You should upgrade or use an alternative browser.
You should upgrade or use an alternative browser.
Correcting "rolled" edges
- Thread starter shedhorn
- Start date
I get this all the time in may of the scans I have obtained from archives. one method I use is marque sellect the corner/area are plus about a little bit extra area. then right click distort, then clock on the "extra distort Grid." button, which will then put in extra distortion points, which you can use as bezier type contraols to straighted up lines. BUT, never touch the inside edged distortion points. you can use the outer corner point to bring the far corner down to any guide. (also best method to make the selection into a new layer when you do this.)
(note, in bad cases of distortion, a really wavy edge, that neegs to be straight, this can be done multiple times, working on smaller areas at a time.)
(may not have explaied that well, but hope you get the idea)
regards, Sandy
 is
is
(note, in bad cases of distortion, a really wavy edge, that neegs to be straight, this can be done multiple times, working on smaller areas at a time.)
(may not have explaied that well, but hope you get the idea)
regards, Sandy
 is
isI spent some time tinkering today and made some progress. The big challenge I face is I get the “cut lines” after I warp, but I’m sure I’m doing something wrong.here is my quick attempt... but if done multipl etimes can eliminate it completely... regards
(not brining down the top line of the froma compresses the width of the matt. hence doing it one for the top of the frame, and then for the matt is my suggestion.)View attachment 83806
Are you copying the selected area to a new layer. "command J"..? if selectinag and working on the same layer as main image, there will be line where the image is stretched/distorted from. and they will often be in the same colour as the set "background color" (in colour selector). as per below.
when it is on a seperate layer that area may simply be erased to show the image underneath.
 .
.
when it is on a seperate layer that area may simply be erased to show the image underneath.
 .
.


