What's new
Photoshop Gurus Forum

Welcome to Photoshop Gurus forum. Register a free account today to become a member! It's completely free. Once signed in, you'll enjoy an ad-free experience and be able to participate on this site by adding your own topics and posts, as well as connect with other members through your own private inbox!

Clone Stamp Tool Practice Thread #1


IamSam

Administrator
Staff member
Administrator
Messages
23,617
Likes
13,537
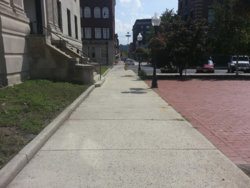
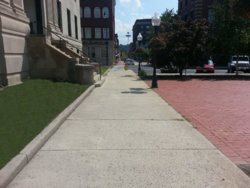
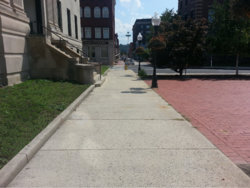
This is a "CLONE STAMP TOOL" practice image for newbies only! Please read instructions carefully and post your results between sections for inspection and evaluation. Take your time, don't rush! This exercise is meant to help you improve your Ps cloning skills. We really hope your willing to participate. Please ask as many questions as you can if your having problems...................that's what this is for!

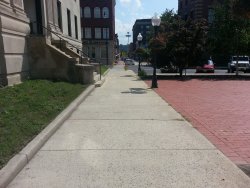
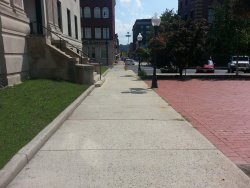
In the photo below, I would like to have the following changes made:

SECTION I
GRASSY AREA ON LEFT SIDE OF PHOTO
(I don't know if this is actually grass or some kind of ground cover plant)

1. Have the construction poles with the red caution tape removed.
2. Remove the boxlike object from in between the poles.
3. Remove the dirt mound behind the poles.
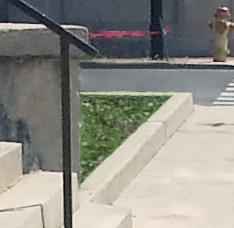
4. Clean up the curb directly in front of the grassy area in the foreground.
5. Clean up the curb directly in front of the grassy area in the midground (other side of stairs).
6. Remove the red caution tape from the grassy area in the midground (other side of stairs).
7. Clean up the grass. Do not replace the grass, just clean it up using the grass that's already there.

Complete this section and submit your work for inspection before moving on to the next.

SECTION II
SIDEWALK

1. Remove the window reflections on the sidewalk.
2. Remove the dirt next to the curb on the sidewalk.
3. Remove the red and yellow paint on the sidewalk.
4. Remove any debris from sidewalk.
5. Remove any grass growing in the cracks of the sidewalk.
6. Remove the rust stains and the drain from the sidewalk.
7. Remove the plant growing at the base of the second light post.
8. Remove any debris, grass, or imperfections from the bricked in area.

Complete this section and submit your work for inspection before moving on to the next.

SECTION III
PARKING LOT AND STREET IN MIDGROUND

1. Remove the Jeep, the red car, and the white car parked in the parking lot.
2. Remove the two people walking across the street.
3. Remove white marks on street.
4. Remove the drain grate on the street by the side walk corner and fire hydrant.
5. Remove the slanted street marker sign located in the middle.
6. Remove the rear end of the blue car parked on the street (left side of photo).
7. Remove the two lights over the "al savings bank building" sign.
8. Remove the tall street light next to the bank building.

Complete this section and submit your work for inspection before moving on to the next.

SECTION IV
BACKGROUND

1. Clean up brick sidewalk.
2. Remove yellow "Pedestrian in crossing" sign.
3. Remove the slanted white banner attached to the banking building.
4. Remove the line between the two buildings.

Complete!!!
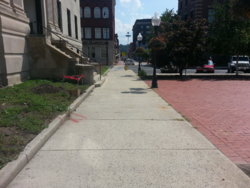
Path.jpg
 
This may be an unnecessary question IamSam, but do you want the clone stamp tool to be the only tool used for the repairs/modifications, or can other tools be used along with the CS tool? I'm not a newbie to photoshop, but I'm still only about a 4 or 5 on a scale of 10! Nowhere close to most of the forum members! I'll work on the photo just to compare my work with others. Don't want to break any rules! :halo:
Excellent idea having the tool practice photos! Thanks!
 
do you want the clone stamp tool to be the only tool used for the repairs/modifications, or can other tools be used along with the CS tool?
Good question...............the exercise was specifically designed for the Clone Stamp Tool. Using some of Photoshop's "content aware" tools would be defeating the purpose. I suppose one might use the Spot Healing Brush Tool for some of the clean up or some of the selection tools to create boundries..........................but if you really want to test your skill set in the manner in which the practice thread was designed, stick to using the Clone Stamp Tool only.
 
Will do! You're right, it will be great practice to use the one tool for all the changes! Excellent exercise!
 
Hi Sam - stumbled onto this one and thought I'd begin. Below is the completed section 1 with clone stamp only. Let me know what you think and, if all good, I'll move on to section 2. If not, I'll continue to poke at it...
- Jeff
clone stamp practice 1 section I.jpg
 
@JeffK Looks good so far. Just a few things to go in section I, cleaning up the curb and grass/foliage. Use the same foliage but cover the entire grassy area so it looks neat and no dirt showing. Don't forget the area next to the building.
Screen Shot 2019-07-27 at 10.05.14 PM.png

Screen Shot 2019-07-28 at 9.27.19 AM.png
 
@IamSam - here is revise of Section. I've cleaned up the grass, curbs, and rebuilt the back grass retaining wall. Cleaned up the far wall that had the remnants of the tall grass. Actually reloaded some legacy brushes so I could get to a shaped clone stamp. Got carrried away and cleaned up the window reflections. Let me know your comments and if I should move on to Section II. This is turning into a labor of love...or obsession. :)
- Jeff
clone stamp practice 1 section I REV.jpg
 
Not bad for a first attempt! However...............

The section I edit is not complete. Part of this exercise is to have you carefully read and follow instructions.
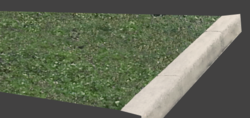
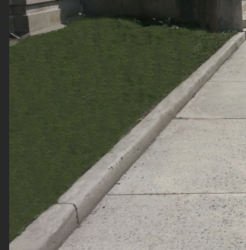
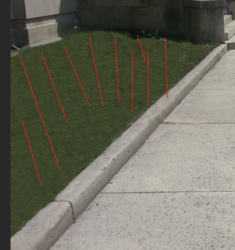
The grass/foliage is muddy and patterned. It almost looks like outdoor carpet.
Screen Shot 2020-01-19 at 2.16.51 AM.png

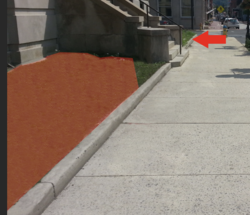
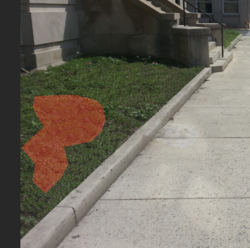
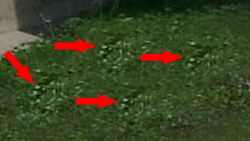
The red area needs lot's of work and you did not complete the area where the red arrow is.
Screen Shot 2020-01-19 at 2.15.04 AM.png

If you look at posts #7 and #8 you can see how the grass/foliage is detailed and sharp with very little clone stamp doubling or patterns.

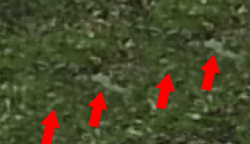
In yours, you can see cloning patterns which denote doubling or cloning the same source material over and over again.
Screen Shot 2020-01-19 at 2.22.58 AM.png

Your curb looks pretty good though! Don't feel discouraged............this is not an easy task. Just takes a little practice.
 
Yes! You are getting better! There is still a large amount Clone Stamp doubling and patterning but it's much better than before!

You have left behind some weeds and growth that's still a little messy. The area does not look properly groomed as you would hope a decent grounds keeper would maintain.

The area in red is the most noticeable and you still have not addressed the grass/foliage on the other side of the stairs.
Screen Shot 2020-01-20 at 11.12.26 AM.png

You are still just dragging through a previously cloned area. This is just one of hundreds of examples.
Screen Shot 2020-01-20 at 11.28.00 AM copy.png

If I could offer any help it would be that you have to constantly change your sample point! Never sample from the same spot twice! Work in very small movements/areas. A little from here, a little from there! Mix and match while cloning.

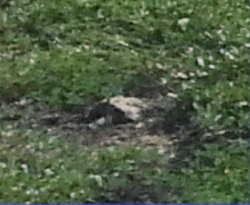
While covering this rock.....
Screen Shot 2020-01-20 at 11.21.36 AM.png

You sample from all over the grass/foliage area so you don't repeat what's being cloned. Never sample/drag through an area that's been cloned.
Screen Shot 2020-01-20 at 11.23.42 AM.png

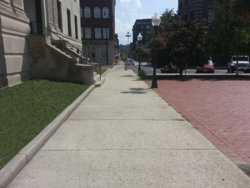
Here you can see that ONLY the native grass/foliage was used to fill in the edited areas. No patterns and no doubling......that you can see without really looking HARD! You will still have some areas that are similar, but not exactly the same.
Screen Shot 2020-01-20 at 11.53.35 AM.png
 
Hey! You're off to great start!

There are few things to point out. While you did remove the objects, and you did sort of fill in some bare areas with the existing grass/foliage as instructed, you have to wonder is this "cleaned" up? If you were the groundskeeper of this building, would you find the areas acceptable? Cleaning up means to make it look more cared for and maintained close to the last screenshot in post #14.

I still see......
Unruly grass
Screen Shot 2020-05-24 at 6.51.57 PM.png

Weeds..
Screen Shot 2020-05-24 at 6.53.01 PM.png
Screen Shot 2020-05-24 at 6.53.05 PM.png
Screen Shot 2020-05-24 at 6.53.12 PM.png
Screen Shot 2020-05-24 at 6.53.22 PM.png

Bare ground...
Screen Shot 2020-05-24 at 6.53.51 PM.png

Rocks or debris....
Screen Shot 2020-05-24 at 6.53.44 PM.png

Bare ground, debris, broken curb, and clone doubling...
Screen Shot 2020-05-24 at 6.53.30 PM.png

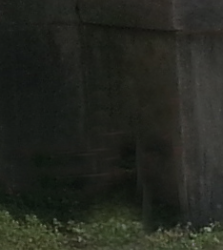
Here you have a section of stairs outer wall which is not in the correct plane.
Screen Shot 2020-05-24 at 6.52.41 PM.png

There is some clone stamp doubling and ghosting at the base.
Screen Shot 2020-05-24 at 6.52.08 PM.png

Lastly, almost the entire distance of the curb is hazy, inconsistent in color ans slightly out of focus in places. The edges are blurred and not clearly defined.

I know that I have pointed out some areas that need work and have not offered help. I'm counting on you to let me know what you might need help with. Be sure and check out the link I mention in post #5 about boundary selections.

Let me know if you don't understand clone stamp doubling. I talk some about that in post #14.
 
I completed section one only using the clone stamp tool. I will await your review. One issue that I have is that for larger areas of cloning I start to blur the image. Any way to avoid that? I think it is OK at viewing 100%, but is very noticeably when zooming in.

Clone Stamp Practice Section _1.jpg
 
I just looked over section two instructions. It looks like I inadvertently included some of the next section edits as part of sections one. I should have read all sections before starting.
 
Dennis...........I'm so very sorry that I missed this thread!

Let me take a look and I'll offer up some feed back!
 
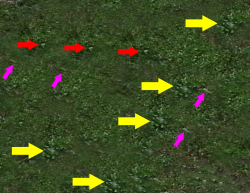
OK..........the main problem I see is what we call Clone Stamp Doubling. It happens when you sample the same "target source" over and over again.

Screen Shot 2020-09-07 at 2.31.19 PM copy.png

Screen Shot 2020-09-07 at 2.33.29 PM copy.png

The way to solve that problem is to very aware of your target source and to sample often. If you see repeating "objects", sample from another area and alter the doubled objects. The more source point you use, you will start to have a very random looking cloned area.

I did this in about 2 minutes on the screen shot I posted above.
Screen Shot 22020-09-07 at 2.33.29 PM copy.png
 

Back
Top