Photoshop Gurus Forum
Welcome to Photoshop Gurus forum. Register a free account today to become a member! It's completely free. Once signed in, you'll enjoy an ad-free experience and be able to participate on this site by adding your own topics and posts, as well as connect with other members through your own private inbox!
You are using an out of date browser. It may not display this or other websites correctly.
You should upgrade or use an alternative browser.
You should upgrade or use an alternative browser.
Clean up a photo
- Thread starter jerseyboy
- Start date
Fatboy73
Guru
- Messages
- 613
- Likes
- 356
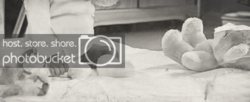
My suggestion would be on the right side, you can do a mix of clone stamping and healing brush to get rid of the nastiness.
The left side, there's just no extra information on what ever that toy is that can be recovered. I would suggest cloning over that
area as well to blend it in with the sheet and just recreating the small portion of the leg that was covered by the toy.
The left side, there's just no extra information on what ever that toy is that can be recovered. I would suggest cloning over that
area as well to blend it in with the sheet and just recreating the small portion of the leg that was covered by the toy.
jerseyboy
Well-Known Member
- Messages
- 47
- Likes
- 2
@IamSam my full size image is 2700 x 2150 pixels I have just clipped the bottom half in a greatly reduced resolution here.
@Inkz I have just looked at Silver Efex Pro 2 and yes it seems to have great potential (I am glad that I scanned the B&W image in color mode!)
@Fatboy73 Thanks for the interesting suggestion.
@Inkz I have just looked at Silver Efex Pro 2 and yes it seems to have great potential (I am glad that I scanned the B&W image in color mode!)
@Fatboy73 Thanks for the interesting suggestion.
Last edited:
ForeverFallenAngel
Power User
- Messages
- 200
- Likes
- 118
Inkz
Guru
- Messages
- 2,358
- Likes
- 1,554
Nice job Angel...
Good to see different methods from different Adobe products.
ForeverFallenAngel
Power User
- Messages
- 200
- Likes
- 118
I wanted to highlight certain parts but keep a vintage look Thanks Inkz 
jerseyboy
Well-Known Member
- Messages
- 47
- Likes
- 2
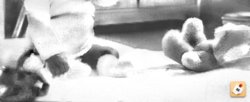
I just cleaned it up slightly using ps express dreamy filter
Do you mean the free Dreamy Photo filter from here?
http://www.autofx.com/freeplugins/dreamyphoto.asp?id=4
ForeverFallenAngel
Power User
- Messages
- 200
- Likes
- 118
Do you mean the free Dreamy Photo filter from here?
http://www.autofx.com/freeplugins/dreamyphoto.asp?id=4
I use my iPhone 4S I have ps express and ps touch the dreamy filter comes with ps express I'm sure if it's from adobe then it will be the same thing hope that helps
Inkz
Guru
- Messages
- 2,358
- Likes
- 1,554
Looks pretty dern good to me!! Inkz, you've been holding out! (I've seen some of your restorations, I knew you could do it!)
I sneaked under the radar, cloak & dagger style

Not sure what the object is on the right side corner, looks like a bunny. Going to try and clean it up a little more.
Hey,
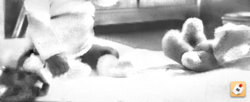
Here is my try to clean the image First made the whole image B&W and then used clone stamp tool to clean it. Wasn't sure what was going on in the foot area and decided to color it. Also reduced some noise and played with curves etc, check the psd below!
Here is the psd so you can see some techniques i use when restoring a photo, hope it helps!
View attachment teddyedit2.psd

Here is my try to clean the image
Here is the psd so you can see some techniques i use when restoring a photo, hope it helps!
View attachment teddyedit2.psd
Last edited:
jerseyboy
Well-Known Member
- Messages
- 47
- Likes
- 2
Hey,
Here is my try to clean the imageFirst made the whole image B&W and then used clone stamp tool to clean it. Wasn't sure what was going on in the foot area and decided to color it. Also reduced some noise and played with curves etc, check the psd below!
Here is the psd so you can see some techniques i use when restoring a photo, hope it helps!
View attachment 37355
Wow, Many thanks your contribution just blew me away. I have looked at the PSD in amazement and in great admiration. I feel like asking you if you would accept the original image and do the restoration - but that I suppose would be cheating
No problem  Yea, it's better to do it yourself and learn by doing. You never learn if you don't try. Hope the .psd helps you get the main idea of what i was doing to the photo and you can follow those things. Just keep practicing!
Here you can get the idea of clone stamp tool which is the most important tool restoring this kind of stuff:
http://www.youtube.com/watch?v=haIY-EULKmg 1:35 ->
The idea is that it duplicates the brush area with the target/selected area. So in this case, select clear non damaged area (which style is close to the damaged area (same color)) and then start brushing over the damaged area. Hope this makes any sense
http://www.youtube.com/watch?v=2EuNslW4NDE 0:37 ->
You can see the + sign moving and showing which area it is duplicating.
(First video 3:22)
I have Wacom tablet so it makes the brushing a lot easier and faster, because of the pressure sensitivity. The harder you press the harder the brush will be. If you are planning to do more stuff like this i highly recommend getting one:
http://www.amazon.co.uk/Wacom-Bambo...9311&sr=8-2&keywords=Wacom+Bamboo+Pen+&+Touch
PS. IF you want i can do it for some $$, but i suggest to do it yourself with these free little tips i gave
Last edited:
jerseyboy
Well-Known Member
- Messages
- 47
- Likes
- 2
No problemYea, it's better to do it yourself and learn by doing. You never learn if you don't try. Hope the .psd helps you get the main idea of what i was doing to the photo and you can follow those things. Just keep practicing!
Thanks for those tips. I have viewed the videos on Youtube and am now looking around for my old Wacom tablet that I had a few years back and never really got on with. I do not find where you reconstructed the little girl's right leg in the PSD but I rather fear that things like that are not for the beginner but rather for a seasoned pro which I suspect you may be
Hey, the reason why you can't find own layer for the leg is because it was all done with clone stamp tool. I duplicated the dark area from her other leg  After i had that shape i placed some contrast/brightness/darkness effect on it to make it look more realistic. You can see those layers there if you click the leg area. It just need practicing to use that tool, but after you get the idea it is pretty simple thing to do!


