Thanks
@Thesimp
You additional information and files helped me understand your problem.
My understanding is that each and every TIFF file used the exact same Colormap which is just all shades of pure red (green and blue are zero) so the color table goes RGB values 0,0,0 to 255,0,0 1 bit at a time (for a full 256 full table) and no transparency involved.
For all of your attempts, no matter how you change the image the Colormap is not preserved with is important to you (not sure I know why yet that is not important).
There may be a more elegant way to do this yet I believe I have a solution that I believe works yet you will need to try it out to verify. I will include that step by steps with screen cut and pastes.
Note that there are many ways to make adjustments in Photoshop and that if you want the image you are adjusting that is only using the Red Channel, then you must also be careful not to make adjustments that introduce non-zero values in the Green or Blue channels. If you do, the image you see on the screen will not represent what gets saved with a all Red Color Table. If you need help with how to insure this, just let me know. Using Layer Styles you can turn off the off the Green and Blue channels so it is a non issue yet for now, I will assume you are fine making adjustments and don't need this help unless you ask.
So here are the steps that you can take.
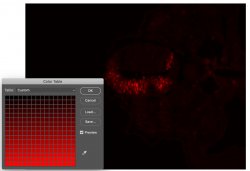
First when you load you image here is the sample image you provided with its indexed color table:

- The first thing you do is use the Save function on this panel to save the Color Lookup Table. Just save it to a location where you will be reloading it later in this process.
- Change to RGB mode as the next step (Image > Mode > RGB Color.
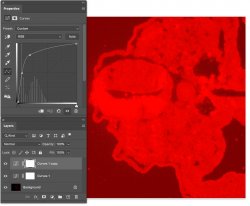
-I changed the image by using just the a Cruves Adjustment Layer adjustment Layer and I duplicated that adjustment Layer to really make the background come out.

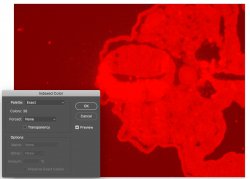
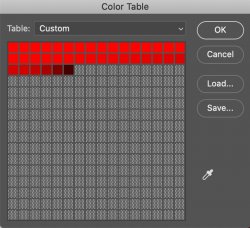
- Now if I just converted by to Indexed Color mode with a typical settings. Note that in the panel it shows it only needs 38 colors and is not using the original Color Table.

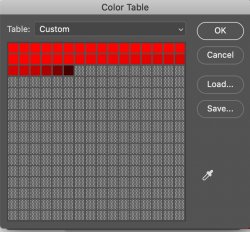
- This is the Color Table for the new image:

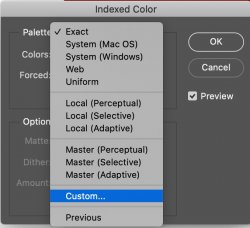
That is not what is wanted so I backed back out with CMD +Z and used the following steps when converting back to Index mode. First in the Pallete dropdown choose Custon:

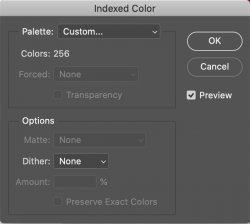
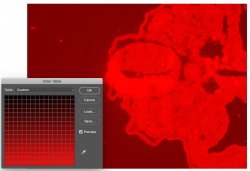
- In the Indexed Panel options make sure Dither is turned off in the lower portion of the options and in the Palette dropdown choose custom. A color table will pop up as in this next image. Select the Load button and load the Color Table you saved at the beginning of the instructions above.

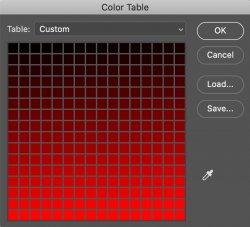
After loading the original Color Palette it should now appear as follows:

Click the OK button and you go back to the Index Color Panel options (double check that "Dither is still set to none) and Click the OK button.
This will make the conversion to Indexed Colors yet forcing the Color Table to be the one you started with.

You can verify that the Color Mode is Indexed and bring up the Color Table again and verify that the original Color Table is in place.

A bit tedious and there might be a more straightfoward way yet I believe this shows a path of how to get it done.
Fingers crossed my explanation was clear enough and gives you the result you are seeking.
John Wheeler


