What's new
Photoshop Gurus Forum

Welcome to Photoshop Gurus forum. Register a free account today to become a member! It's completely free. Once signed in, you'll enjoy an ad-free experience and be able to participate on this site by adding your own topics and posts, as well as connect with other members through your own private inbox!

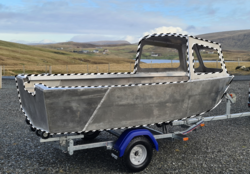
Change boat color from bare aluminium to white or another color!


RLshetland

Member
Messages
6
Likes
0
Morning all,

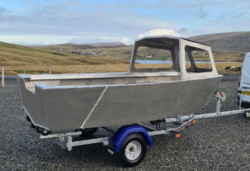
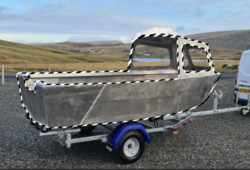
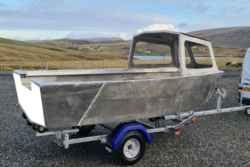
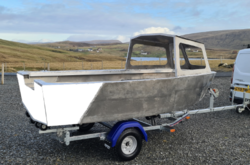
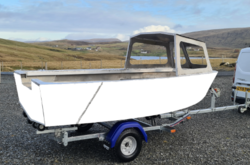
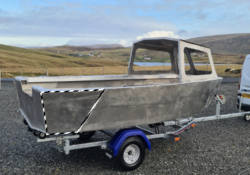
I have been trying for days when i have had a chance, to change the color of this boat to look like its painted white with absolutely no success, I wondered if one of you may be able to explain how this can be done.

Thanks in advance
Robert

20220202_121122.jpg
 
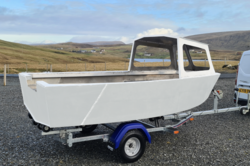
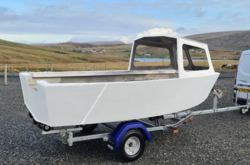
Had a moment and decided to play with this. I don't think it's the best way to go. Still not quite right (for me).

Will wait for other replies before I post the "How -To".

Screen Shot 2022-02-27 at 10.46.56 AM.png

Color sampled from trailer fender.
Screen Shot 2022-02-27 at 10.53.03 AM.png

Red?
Screen Shot 2022-02-27 at 11.03.02 AM.png
 
Had a moment and decided to play with this. I don't think it's the best way to go. Still not quite right (for me).

Will wait for other replies before I post the "How -To".
Hi
You've got a lot further than i have to be honest! And as far as the how to goes, it would be much appreciated.

Thanks
Robert
 
The white of the boat is the color of the van sampled from the red X area.

You can't make the boat a solid color without blending, otherwise you lose dimension.
Screen Shot 2022-02-27 at 11.11.39 AM.png
 
The white of the boat is the color of the van sampled from the red X area.

You can't make the boat a solid color without blending, otherwise you lose dimension.
View attachment 127769
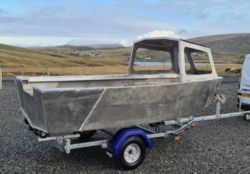
I see what you mean, and i think if you could just let me know how you got to that it would be perfect and i can play with it from there. Thanks very much for taking the time to do this.
 
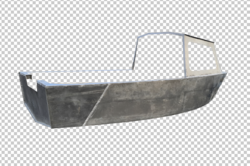
The very first thing I did was to even out the consistency of the color of the body area I want to change.
I really don't want to change the features and tones, just even out the color.

Original.
Screen Shot 2022-02-27 at 3.41.55 PM.png

Evened out.
Screen Shot 2022-02-27 at 3.42.12 PM.png

I first outlined the areas of the boat I wanted to change with the Pen Tool set to path.
I saved the path and made a selection from the path.
This will serve as my layer masking later when I try to alter the color.
Screen Shot 2022-02-27 at 3.46.25 PM.png

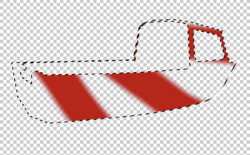
I then sectioned off 3 of the side areas using the Pen Tool.
I made white templates on their own layers so I could go back to them in order to make quick selections.

Transom
Screen Shot 2022-02-27 at 3.51.41 PM.png

Right rear panel.
Screen Shot 2022-02-27 at 3.52.17 PM.png

Right panel.
Screen Shot 2022-02-27 at 3.52.44 PM.png

By using these template, I was able to quickly select the individual areas to even out the colors.
example: Here I can work on only the right rear panel.
Screen Shot 2022-02-27 at 3.55.24 PM.png

Evening the colors was done with the Brush Tool.
I used a soft round brush set to 4% flow and gently worked the areas with a color sampled/selected from the panel itself. I tried to choose one of the lighter colors.
I continued this process until all 3 areas were sufficiently even but not obscured! See the second image posted above.

This gives us a better starting point!
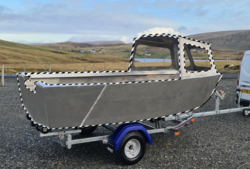
 
The very first thing I did was to even out the consistency of the color of the body area I want to change.
I really don't want to change the features and tones, just even out the color.

Original.
View attachment 127774

Evened out.
View attachment 127775

I first outlined the areas of the boat I wanted to change with the Pen Tool set to path.
I saved the path and made a selection from the path.
This will serve as my layer masking later when I try to alter the color.
View attachment 127776

I then sectioned off 3 of the side areas using the Pen Tool.
I made white templates on their own layers so I could go back to them in order to make quick selections.

Transom
View attachment 127777

Right rear panel.
View attachment 127778

Right panel.
View attachment 127779

By using these template, I was able to quickly select the individual areas to even out the colors.
example: Here I can work on only the right rear panel.
View attachment 127780

Evening the colors was done with the Brush Tool.
I used a soft round brush set to 4% flow and gently worked the areas with a color sampled/selected from the panel itself. I tried to choose one of the lighter colors.
I continued this process until all 3 areas were sufficiently even but not obscured! See the second image posted above.

This gives us a better starting point!
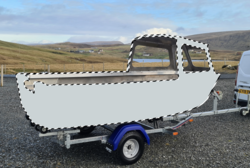
Thankyou very much, once the boat is complete I'll try it and let you know how I get on.
Thanks
Robert
 
Sorry, got dragged away for awhile!

Now for the actual colorization. Now that we have a good starting point, I used the overall selection of the areas I wish to be white that I explained in the third step/image in post #5.
Screen Shot 2022-02-27 at 6.04.36 PM.png

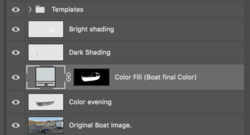
I then added a solid color fill adjustment layer, and made it the color I sampled from the side of the van.
The adjustment layer comes with a layer mask to which the selection was added. This means only the area I had selected will be affected by the solid color fill adj layer.
Screen Shot 2022-02-27 at 6.04.52 PM.png

I then scrolled through the blending modes to see which one looked the best. In this case it was screen.
Screen Shot 2022-02-27 at 6.05.17 PM.png

I felt that there needed to be some gentle shading of the front and rear of the boat, so I added a light shading layer and a dark shading layer.
I again added the selection from the template (or the saved Pen Tool path) and used it to constrain the shading.
I used the Brush Tool, a large soft brush with the flow set to 2, and only slightly darkened and lightened the transom and the front of the boat on their perspective layers.
This added dimension.
Screen Shot 2022-02-27 at 6.07.28 PM.png

In this case, the adding of color is dependent on the prep of the object..............similar to painting a car (or boat) in real life.
That's about it and this should get you started. I used the same solid color fill adjustment layers for the colored versions. The only variables were the different blending modes for the different colors.

Screen Shot 2022-02-27 at 6.16.27 PM.png
 
@IamSam - I appreciate this explanation as well. I had tried editing this image but none none of the paths worked that I would ordinarily take. The most difficult block was the shading and tone on the boat's hull. I kept trying to remove it but the colors added would always look "dirty." Didn't occur to me that if I just evened out the tones/shading, it would have been a smoother edit. 👍
 
@IamSam Thankyou for the detailed explanation, have been trying for a while to do what you did, with not much success i'm afraid. I went in and using the pen tool have made a selection of the boat and windows as per your instructions, then i go to make a selection from the path, and it selects it, i can then put it in a layer by CTRL+J, but not sure how to only edit the bit inside the lines, i think I have possibly bit off more than i can chew for a first project with photoshop.
 
I went in and using the pen tool have made a selection of the boat and windows as per your instructions,
OK, do you mean you outlined the boat or you converted the outline to a selection. If you meant outlined with a path and then saved the path....we're good.

then i go to make a selection from the path
Ok, this works provided you made the selection from the saved path. You should not need the full boat selection until later. You must next make the three smaller selections. You can save the path for these selections and recall them, or you can make a template like I did.

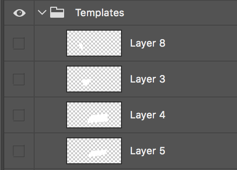
A template is nothing more than, on a new layer, filling the selection with a solid color, then deactivating the layer. I set this layer aside and can recall the selection by hitting Cmd/Cntrl+Click on the template layers thumbnail. I use this technique because it became a habit especially if I had a feathering on the selection. You can't feather a path. If I saved paths, then I would have to recall the path and feather every time I need the selection. It was just so much easier and faster to create templates. You don't have to do this..........it's your choice.
Here are the templates in a folder.....
Screen Shot 2022-02-28 at 11.01.16 AM.png

and it selects it, i can then put it in a layer by CTRL+J
No. I did not mention using CTRL+J!
However, due to myself not knowing your level of Ps knowledge, I did not explain the use of layers or adding layers. I assumed you knew how this was done. You should have created an empty layer before you you made a selection of the saved path. If you don't, depending on what layer you had active, CTRL+J will just copy whatever you had within the selection to a new layer.

Original boat layer with a selection...
Screen Shot 2022-02-28 at 10.36.48 AM.png

If you hit CTRL+J, you get a copy of the selected area on a new layer!
Screen Shot 2022-02-28 at 10.36.59 AM.png
Screen Shot 2022-02-28 at 10.37.29 AM.png

You do not want this!!!

You want the selection on a new layer above the Original boat layer.
Now you can work within the selection using the Brush Tool.
Below is exaggerated for demonstration and I would not be working this layer with the Original Boat Image turned off/deactivated
Screen Shot 2022-02-28 at 10.44.30 AM.png

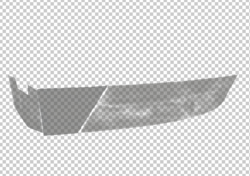
This is the actual Color Evening Layer pictured in the layers panel screen shot from post #8
All the Brush Tool work was constrained within 3 selections on this layer (the templates).
Screen Shot 2022-02-28 at 10.49.05 AM.png

The only time I used the full boat selection was when I added it to the Solid Color Fill adjustment layers-layer mask.
Screen Shot 2022-02-28 at 10.53.31 AM.png
 
@IamSam thanks again, and as far as my experience goes, you could say i am a beginner in every sense, played around with photoshop before but never tried to do anything, but now i need to learn it for my boats, thankyou very much again for your help, will try this tonight.
 
thanks again, and as far as my experience goes, you could say i am a beginner in every sense,
OK, no problem! If you have any questions just ask.

A few years ago I was rather rudely admonished by a newer member who demanded that I not respond to his future questions (he only asked one) because he thought I was talking down to him by including large amounts of detail in my step by step answers. He thought I was treating him like he knew nothing about Ps. He claimed that it was demeaning for me to assume that he, or anyone, needed all the extra details. He felt like I should just get to the point! I explained that my details were not necessarily for him, but for future readers of the thread that may not have his experience.

Later, some of the regular members made some comments on my step by steps which really did not set well with me. Since then I have limited the amount of detail in my explanations in order to avoid upsetting anyone. I tried asking about Ps experience but I found that they (new members) would claim knowledge but did not understand simple and basic Ps concepts. So I stopped asking. Now I just try to post the minimal amount of details and let the OP ask questions if they need to.
 

Back
Top