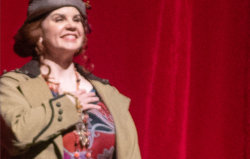
Hi crumpbumpy
Carlbush just posted an excellent image as well so maybe Carl can add what was done in his post processing as well.
Here is the info form my attempt.
The image I posted to the forum is the exact same resolution of the TIFF that you posted. All you have to do is be logged in to the forum, click on the image to view it separately, right click on the image and download. You already cropped it for 5x7 aspect ratio and I saved it in sRGB color space. You have plenty of resolution for a 5x7 print already.
Here are some additional comments on approach
1) The resolution you provided in the TIFF was already much smaller than the full resolution of your Canon Powershot. Not sure if this was from your camera option settings or that was because of the limits of where you were sitting in the audience and already cropped out most of the pixels. Having the best image to begin with including resolution would be helpful
2) The TIFF you provided was already post processed in Lightroom so the adjustments I made may be countering some of the settings you have already done. It is possible that starting with your raw image from the camera would be a better starting point rather that starting from your post processed image. I suspect the noise in the image might have come from over sharpening in Lightroom.
That said, there are the steps i took in Photoshop
1) Converted to Smart Object
2) Applied Box Blur at 2 pixels to mange the over sharpening (this may have not been necessary if starting from the raw file). Making the setting just below a full blur of the noise helps fool the eye that it is sharper even though it is remnants of noise (go figure)
3)Applied Camera Raw (ACR) filter and made the follow adjustments
- Exposure +.35
- Contrast _ 18
- Highlisths -36
- Clarity + 31
- Vibrance +20
The eye/brain interprets higher contrast at edges to be sharper. The slightly higher exposure, contrast, and especially clarity helps here. The higher vibrance also helps yet secondarily.
4) Also in ACR I way overdid the sharpening which has its downsides yet due to the focus being off and compensating for the high noise left quite the challenge
- Amount 150
- Radius 3.0
These were unusually high numbers and will not look good looking close or pixel peeping yet the eye/brain averages this out when the image is looked at from a 5x7 print size
5) Then using the ajustment brush for localized sharpening. The eye/bain focuses on facial / head features the most so selectively sharening the eyes, eyebrows, nostrils, mouth, and sometimes other transition areas such as ears, jawline, hairline, and in this case the hat can also fool the eye/brain to make it seem feel sharper overall.
My settings in the adjustment brush were:
- Clarity +21
- Sharpness +45
- Noise reduction - 36
It does not look good if pixel peeping yet if viewing the image as in a 5x7 it helps the appearance of sharpness.
Not of the settings were a fine tuned adjustment. Just quick sliding of the sliders until it just felt right and from some personal experience.
I am far from expert and was not going for a quick result to help you out.
Hope these details are helpful
John Wheeler

