What's new
Photoshop Gurus Forum

Welcome to Photoshop Gurus forum. Register a free account today to become a member! It's completely free. Once signed in, you'll enjoy an ad-free experience and be able to participate on this site by adding your own topics and posts, as well as connect with other members through your own private inbox!
Best way to accurately select night sky


inferlogic

Member
Messages
10
Likes
1
Hi ,

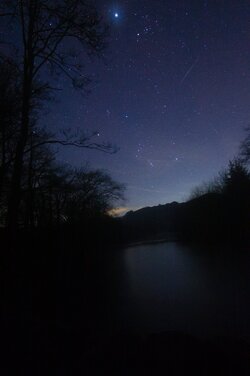
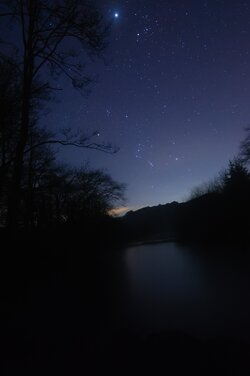
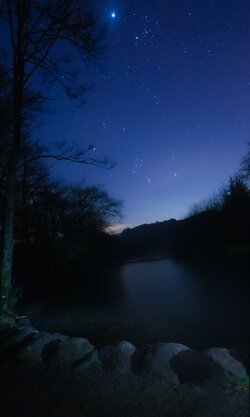
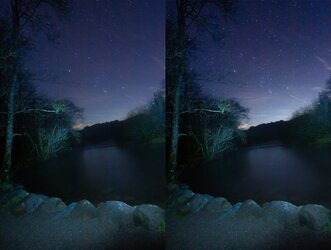
Just wondering on this image what would be the best way to select the sky to replace it with a stacked version the sky is full of tones similar to the tress and water and makes it hard to select.

Thanks in advance

_MG_0266.jpg
 
One way and if you are using PS, Select/Sky; enter Quick Mask Mode and refine the selection with a black (add to selection)) or white (remove from selection) brush; exit QM mode and save the selection to an alpha channel. Now, with this channel active, you can make any changes you like, isolated to that selected area. i.e. curves, saturation, etc.

For example ...

Sky-Selection.jpg
 
Sometimes, using Channels can be helpful with difficult selections.
  • Go into the Channels palette and examine each individual channel: red, green and blue. You're looking for the channel that has the most contrast between the sky and the rest of the image.
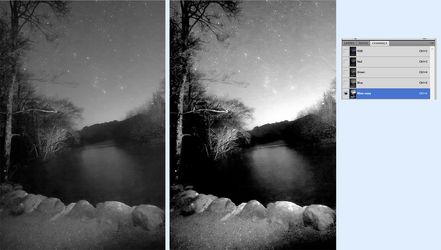
  • The one that best isolates the sky is the blue channel, shown here on the left.
  • Make a copy of the blue channel and press Ctrl+L, which opens a Levels adjustment. Play with the Levels sliders to further lighten the sky and darken the trees. My result is the image on the right.
  • From this new image, I used the Magic Wand tool, set to contiguous. Holding down the Shift key (which adds to your selection every time you click), I clicked the Magic Wand onto several areas of the sky to try to select as much as possible while not selecting the trees.
  • Once you have a reasonable selection, save it. Then reactivate the RGB Composite channel and go back into your Layers palette.
  • You can now use your saved selection as a mask for a new sky. It won't be perfect because this is a very dificult selection, but it might be good enough as a starting point for further manual adjustments.


1737138799887.png
 
Channel masking is the only way to accurately select the sky for this image and it's not going to be a "total" selection.
 
Sometimes, using Channels can be helpful with difficult selections.
  • Go into the Channels palette and examine each individual channel: red, green and blue. You're looking for the channel that has the most contrast between the sky and the rest of the image.
  • The one that best isolates the sky is the blue channel, shown here on the left.
  • Make a copy of the blue channel and press Ctrl+L, which opens a Levels adjustment. Play with the Levels sliders to further lighten the sky and darken the trees. My result is the image on the right.
  • From this new image, I used the Magic Wand tool, set to contiguous. Holding down the Shift key (which adds to your selection every time you click), I clicked the Magic Wand onto several areas of the sky to try to select as much as possible while not selecting the trees.
  • Once you have a reasonable selection, save it. Then reactivate the RGB Composite channel and go back into your Layers palette.
  • You can now use your saved selection as a mask for a new sky. It won't be perfect because this is a very dificult selection, but it might be good enough as a starting point for further manual adjustments.


View attachment 149109
Thanks for the pointers, I'll give it a try :)
 
With Channel masking (Rich's Demo), you can remove enough of the existing sky while preserving the trees.........
Screen Shot 2025-01-17 at 12.52.09 PM.png

....to make it look halfway decent when replaced with a new "night" sky.
Screen Shot 2025-01-17 at 12.56.28 PM.png
 
For fun .. tried Edit/Replace Sky and Denoise to remove the still-visible stars. Flipped a copy of the new sky and masked it into place for a refection in the foreground.

New-Sky.jpg
 
I came up with another method.
  • Open a Black & White adjustment layer above the original image.
  • Move the Blue slider all the way to the right, which lightens the sky.
  • Add a Levels adjustment to further lighten the sky and darken the trees.
  • Add another, similar Levels adjustment, but with a layer mask to lighten only the darkest part of the sky at the very top of the image.
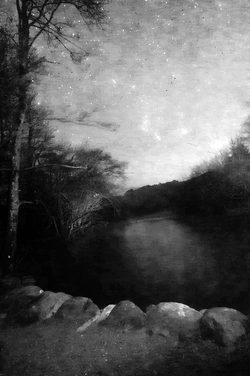
  • After all that, you'll have something like this:

1737145122482.png


  • Copy this merged image to a new layer at the top of your layer stack.
  • Temporarily turn off the visibility of all other layers.
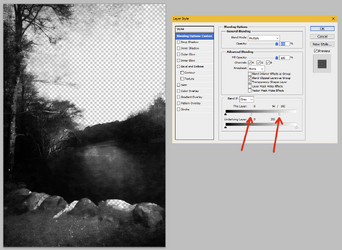
  • Open the Blend-If panel on this top layer and eliminate as much of the sky as possible. Something like this:
1737145414594.png


  • To address the gray "cloudy" issues where the sky was not fully eliminated by Blend-If, use a soft brush with the brush blend mode (not the layer blend mode) set to Overlay and the brush flow set to about 10%. Gently paint with white to brush away these stray grayish areas. You can paint white over the dark trees because the brush is set to Overlay and will have little effect on dark areas.
  • Change the blend mode of this top layer to Multiply and reactivate the bottom, original layer.
  • You can now insert a new sky between your base layer and the Multiply layer we just worked on.
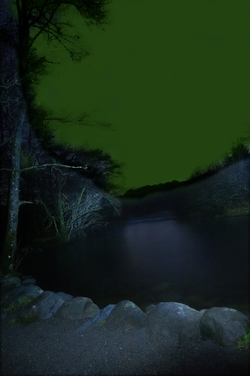
  • I added a green sky to illustrate how it came out. Yours will look better with a more normal night sky.

1737146315412.png
 
Hi @inferlogic
Some techniques might work with a better original image. The one posted is JPEG at 15X size compression, so it makes masking the fine details more difficult. Do you have a better original image, such as the raw version of the image or one of similar quality?
 

Back
Top