Jessicayla
Hoopy Frood
- Messages
- 846
- Likes
- 411
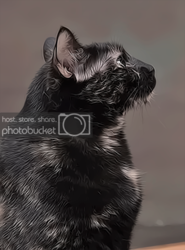
Hiya guys. Been a while. I've been caught up with my jobs and playing Skyrim. Decided to take a break and edit a photo that I've been wanting to for a while. Caught this one really quickly while I was setting up a rat photo shoot. Tandi was on the ground while the lighting set up was much higher up, so obviously it was underexposed. Nothing photoshop can't fix though! Before:

After:

I wanted to make it more interesting color wise, but wasn't sure what to do. Feel free to edit your suggestions and post them here
Some things I'm not happy about - grainy quality because of the lightening and the loss of detail in the darker black parts of her fur. Other than that, I'm happy with it!

After:

I wanted to make it more interesting color wise, but wasn't sure what to do. Feel free to edit your suggestions and post them here
Some things I'm not happy about - grainy quality because of the lightening and the loss of detail in the darker black parts of her fur. Other than that, I'm happy with it!
Last edited:


