What's new
Photoshop Gurus Forum

Welcome to Photoshop Gurus forum. Register a free account today to become a member! It's completely free. Once signed in, you'll enjoy an ad-free experience and be able to participate on this site by adding your own topics and posts, as well as connect with other members through your own private inbox!

1rst composited image


pomacanthus

Member
Messages
17
Likes
12
Newbie here, posted my very first composited image, these are stock images I purchased. Ive been spending some quality time with Lynda.com trying to learn photoshop basics.
Looking for constructive criticism, advice, and opions. This was assembled from 3 separate images as you can see I included the layers. Im calling in "Monsanto Man" for obvious reasons and the red text is a moot point because you all could airbrush that away in seconds I suppose but it was my feeble attempt at ownership which I now I see is probably pointless here lol. Like i said in my brief introduction Im a former 4C lithographer and assembled stuff by hand back in the day so I get layering/masking in analog trying to retrain my brain to do it digitally.

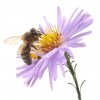
Masking is my biggest challenge at this point, I somehow managed a crude mask on the flower/bee

Should have probably made on for bird man, would have been cool to figure out how to color the masked bird man background an eerie yellow/amber/gold
BUT Im pretty burnt out just getting this far. As far as I can tell there are at least a couple hundred ways to create a digital mask, back it the day I used rubylith
and an exacto knife (so much simpler lol)

So like I said my first attempt, awfully time consuming plodding thru instruction videos but Im relatively happy with it, impressed my FB friends so that worth something :cool2:
 

Attachments

  • Snip20150702_1.png
    Snip20150702_1.png
    1.3 MB · Views: 8
I think it's a fantastic first effort! The one thing I'm really impressed with is it's composition........excellent job!

As far as the actual Ps work, there's only 1 thing that I think needs some work and you have already pointed that out and that is the selection and masking of the flower and Bee.

Any of our regular core members would be more than willing to help you out if you would like suggestions and tips on how to improve the masking process. If you don't mind posting the original flower image so that they/we can use it to demonstrate different techniques. Masking can be a bit intimidating at first but it's really not that difficult once you know a few of the tricks.

Of course there are many different techniques, but changing the color of the BG would be a matter of clipping a Hue & Sat layer (set to colorize) to the BG layer.

Great work, keep it up!
 
Here is bird man would love some help masking this guy so I can play with the background color, huge thanks to you experts!
I moderated my own forum in my industry back in the day (20 yrs ago) when the internet was barely invented and you have my
bow of respect for your efforts moderators, you guys and gals are saints to offer free online help and I for one really appreciate it.Birdman resized for gurus.jpg
 
As you can see I feel obliged to color bird man with the airbrush because Im primarily a painter mixed media artist and I can't leave things alone lol.
I love PS when it works like I want it to !
 
As you can see I feel obliged to color bird man with the airbrush because Im primarily a painter mixed media artist and I can't leave things alone lol.
I love PS when it works like I want it to !

Don't get used to that!!!
 

Attachments

  • birdman.jpg
    birdman.jpg
    188.2 KB · Views: 50
pomacanthus said:
Masking is my biggest challenge at this point, I somehow managed a crude mask on the flower/bee

Should have probably made one (mask) for bird man, would have been cool to figure out how to color the masked bird man background an eerie yellow/amber/gold.....

Here is bird man would love some help masking this guy so I can play with the background color, huge thanks to you experts!

Sorry, I'm going to get on my soapbox for a moment.............

Why is everyone making their own version of this image when the OP has asked us for masking help????? How is that helping?

@pomacanthus I'm very busy for now, but I will be back to help you out with the masking.
 
Stands on step ladder, do you want people engaging or do you want people not making any form of reply i notice sicknote 'liked' your comment.
 
As an artist I like seeing the others creative input, however; I still have no idea how to mask the flower or the creepy bird guy and Im confident eventually someone will post it. I realize Im boring the heck out of the old timers/experts but doesn't mean I can figure it out, remember Im a newbie with a hunger to learn lol <not kidding>
 
Stands on step ladder, do you want people engaging or do you want people not making any form of reply....

What would be the harm in those same people engaging with the help that the OP asked for? If your going to take the time to actually rework the original image (which included masking), then you may have also had the time to address the question at hand.

Ok, I'm off my soapbox.
 
Ok here are a few tutorials that will help you with masking.

Refine edge:

This video explains the basic principle of masking. Although the technique of creating the selection may vary, using refine edge/mask
and then making fine corrections by painting on the mask are some of the most commonly used techniques in creating masks.
http://www.youtube.com/watch?v=nOjzTbP8eT8


http://www.photoshopcafe.com/tutorials/refine-edge/refine-edge.htm

http://planetphotoshop.com/using-refine-edge.html


Complex selections:

http://design.tutsplus.com/tutorials/making-complex-selections-1--psd-22705

http://design.tutsplus.com/tutorials/making-complex-selections-2--psd-22714


Removing white backgrounds:

http://www.youtube.com/watch?v=GrDgTQZhCaY

http://www.photoshopbuzz.com/removing-background-photoshop/


Channel Selection:

http://planetphotoshop.com/masking-with-channels-2.html

http://planetphotoshop.com/using-channels-to-make-better-selections-in-adobe-photoshop.html

http://phlearn.com/separate-parts-of-your-image-with-photoshop-channels

http://layersmagazine.com/planet-photoshop-masking-with-channels.html

http://planetphotoshop.com/masking-with-channels.html

http://www.youtube.com/watch?v=jvBAvZyqPmU

http://www.youtube.com/watch?v=GsXbDLglasA

http://www.youtube.com/watch?v=k-aizjdm5Us

Calculations:

http://www.youtube.com/watch?v=Vqg4m2q2eek


One of the best tools for making selections is the Pen Tool. It's not always needed but I suggest that of all the tools you need to start learning, the Pen Tool should be number 1 on your list.

Video Tutorials on the Pen Tool:

https://www.youtube.com/watch?v=9FvnxmwHVpM

https://www.youtube.com/watch?v=6WJj6iNr6K0

http://www.youtube.com/watch?v=X9vUqFSH1lc#t=17


Written Tutorials on the Pen Tool:

http://psd.fanextra.com/tutorials/become-a-master-of-the-pen-tool-in-under-30-minutes/

http://www.photoshopessentials.com/basics/custom-shapes/

http://design.tutsplus.com/tutorials/photoshops-pen-tool-the-comprehensive-guide--psd-718

http://helpx.adobe.com/en/photoshop/using/drawing-pen-tools.html
 
Here's video showing the process details of creating a layer mask for the flower. It involves using the steps described in the first tut vid in my last post. This is only one process of many that can be used for creating masks.

I do need to add that I'm using a Wacom Tablet. For me it was a vital investment.

 
Nice vid MrSam!

Good to see you 'blurring' the edges after stamping the background.....its amazing how many people never think to do that after merging a masked image on a BG.

A method I use to do this is with a path....yes, a path!

With ref to your video you could easily create a marquee from the layer 'Background Copy 4'.
From the marquee you can create a work path......icon at the bottom of the path panel.

With the work path active and the stamped layer selected, select the 'Blur' tool....adjust your settings....and then...

...just hit 'Return'...or 'Enter'...or whatever.

You'll find that any pixels under the 'work path' will then get blurred.....and you can keep hitting 'Return' for a compound blurring effect too......works especially well with a low blur amount, then just keep hitting 'Return' to the blur amount you want.

This also works with the 'Brush' tool and 'Sharpen' tool and probably others too.....but its for 'Blur' that I mainly use this method.

Its basically a shortcut to right click and select blur, or stroke, etc.

Just a little 'tip' for ya. :thumbsup:

Regards.
MrToM.


I work exactly the way you mentioned...funny enough, you are the first one I actually get to know who uses this method. I call it fast controlled blurring.
Regards Chris.
 
...funny enough, you are the first one I actually get to know who uses this method...

Thanks Chris.

I've mentioned 'blurring' the edges many time before but it always seems to fall on stony ground so I gave up mentioning again.

There seemed little point in highlighting a 'shortcut' to something nobody does so I've never mentioned it before.

At least now we know of three people that do it! :bustagut:

Regards.
MrToM.
 
Thanks IamSam. I really liked the photo cafe video (2nd one down). It allowed me to create my first decent mask you can see the new butterfly on flower and it only took a few hours :-) lmao. Anyway I tried to merge it into bird man and you can see where it ended up, when I try to drag it into position on the left the background mysteriously reappears and I can make it go away...Im mentally spent for today but Im planning on going down the list you provided as I learned a ton just from the first 2 videos. Thanks and Im sure there is a simple solution to the problem I outlined but I just can't seem to find it.


Snip20150705_18.png
 
Also thanks for the video man that was really cool of you, I haven't had time to watch it yet but will be spending a bunch of time in this thread over the next few weeks.
 

Back
Top