Photoshop Tutorials
Interlaced Scanline Effect
PAGE 1 / 2
| Step 5 - Method 2 |
Get in there and start playing with the over 90 stock effects filters that come with the program!
There's a world of creative effects just waiting for you to find them! Trust me!
Creating 'Scanlines' using a Photoshop filter; 'Halftone Pattern...'
The following method will explain how to create a 'scanline' effect using one of Photoshop's stock filters called 'Halftone Pattern'. This filter is part of the 'Gallery Effects' filters that come with the program.
Note: this method will only seem long because you're doing it for the first time. Once you know what to do, it takes only seconds to create the effect. Plus, I'm adding in some extra info for you here (of course!) ;)
| Step 6 |

When choosing the 'Lines' style, one thing to note is that you have some control over the thickness and spacing of your lines. This is partly dependant on what setting you use for the 'Contrast' option. Generally I set the contrast to 25 percent if I have the 'Size' set to 1. This will produce black lines that are 1 pixel thick, separated by a 5 pixel white line. Any line size above 1 I set the contrast to 50 (which is the maximum). And another thing to note about this filter is that the smallest 'even' line thickness it will produce is 3 pixels; it will not create a 1 pixel line followed by another 1 pixel line. The smallest even stripe pattern it produces is a 3 pixel thick line followed by another 3 pixel thick line. (even though the 'Size' setting says 1)
Look at these examples: (your Background color will determine the line color)
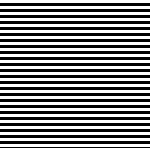
 Size set to 1 / Contrast set to 25. Evenly spaced 3 pixel thick lines. Background color doesn't matter. |
 Size set to 1 / Contrast set to 50. 1 pixel thick lines spaced 5 pixels apart. Background color was black. |
Ok so now that we're a bit more familiar with how the filter operates, let's create our own example.
| Step 7 |
Note: We would normally apply the filter directly in our working document, on its own layer. But for now, we're just seeing how the filter works.
| Step 8 |
| Step 9 |
T I P S
- Create other scanline variations by duplicating your first scanline layer, and use the Move tool and your arrow keys to nudge the duplicate layer up a few pixels. Set the duplicate's Blend Mode to Multiply also. This can produce an uneven line effect with an interesting and different kind of look.
- Note when using thicker lines, also adjust the 'Contrast' setting up until you see the lines become sharp and clean. But should you desire a somewhat 'fuzzy' or blurred effect (a more true HalfTone effect), don't adjust the Contrast setting at all.
- For a different looking effect, try using Screen, Overlay, Soft Light, or Difference blend modes. And for a completely different effect, set the Blend Mode to Dissolve, and drop the layer's Opacity down to anything between 10 & 80 percent. To 'invert' the effect, just press Ctrl+I to invert the colors.
Experiment with other ways of making this effect look different from how other people are using it. Find your own 'style' for this effect.
I hope this information has been inspirational to you.
Have fun!
Copyright © Mark Anthony Larmand
For help, advice, tips and tricks, challenges, feel free to visit our
PAGE 1 / 2


