


Photoshop Tutorials
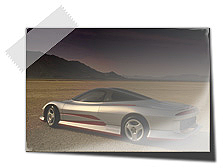
Scotch Tape
| Step 1 |
| Step 2 |
| Step 3 |
| Step 4 |
NOTE: If you've never REALLY looked at a serrated edge before, go get a roll of scotch tape and tear off a piece. Then look closely at its edge(s) to fully examine its characteristics.
When you reach the outside edge on the right, click the tool up and away from the rectangle and then back toward the beginning of the selection where you started it. Then click on the start point of the selection to close it. Now press Ctrl+H to hide the selection. Then hit the Delete key to remove the contents of the selection. If the jagged effect is to your liking, hit Ctrl/Cmd + D to deselect. If it's not, then Undo the delete and redo the selection part. (don't forget to unhide your selection - Ctrl+H)
| Step 5 |
| Step 6 |
| Step 7 |
| Step 8 |
There... for a simple 'scotch tape' effect, that's all you need do.
BUT... if you'd like to add a 'rubbed-on' effect to the tape, click the NEXT button below to find out a few ways of adding more detail to your tape.
| Step 9 - Adding more detail |
 Notice the air pockets in the tape, in this sample image on the right?
Duplicate your finished tape layer, and name it 'rubbed 1'. Set the duplicate layer's Blend mode to Lighten, and turn down its Opacity further to 25%. Then click on the Preserve Transparency check box for the layer.
| Step 10 |
Note In the above sample, the lightest areas (air pockets) you see are where I applied my white paint over the tape. These lightened areas of the tape would suggest that the tape is not stuck to the photo it's holding up. And it's this small space between the tape strip and the photo's surface that allows light to reflect inside,
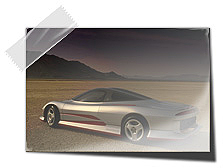 giving the tape in those spots a lighter shade.
Ok that's one way of doing a 'rubbed-on' effect.
Here's another way to strengthen the effect, which produces slightly different results; such as wrinkles and creases.
| Step 11 |
| Step 12 |
Click OK to apply the filter. If you like, you can play with these settings more after you see how the effect is created.
Now turn off the 'rubbed 1' layer by clicking the eye to the left of the layer's name. Only one of the 'rubbed-on' layers can be visible at a time. Otherwise, the effect is overkill and the realism is lost.
And that about does it for this effect. I hope everyone enjoys it!
Onward'n'Upward!
Copyright © Mark Anthony Larmand
For help, advice, tips and tricks, challenges, feel free to visit our