What's new
Photoshop Gurus Forum

Welcome to Photoshop Gurus forum. Register a free account today to become a member! It's completely free. Once signed in, you'll enjoy an ad-free experience and be able to participate on this site by adding your own topics and posts, as well as connect with other members through your own private inbox!

How to achieve consistent rgb values on gray background?


golgo13

New Member
Messages
1
Likes
0
Hello all

I have a question about a method that I feel is really simple but that I just can't figure out.

I have an image here, a product on grey seamless, and the rgb values across the seamless vary. In the top left the rgb values are around 200 - 208, in the bottom right the values are around 160 - 180. I need to make the values of the background close to consistent all around, however without just painting in a solid grey. There needs to remain some texture of the actual seamless. The result should be like the second image. Is there a way to achieve this fairly quickly and easily?

Any help at all would be extremely appreciated


12.jpg


2.jpg
 
You essentially are trying to equalize the illumination intensity. A good technique for doing this on a background with no large features is to estimate the illumination intensity; exaggerate area-to-area variation in it; invert it, and then apply the result as a layer in "Overlay" layer blending mode.

Here's an example.

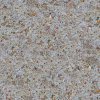
I started with this uniformly illuminated, seamless concrete texture (image #1):

layer0001-Starting image_ Uniformly illuminated seameless texture.jpg

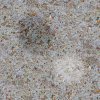
Next, I dodged one area and burned a different area to simulate uneven illumination (eg, a hot spot, and a shadow, respectively) that needs to be corrected (image #2):

layer0002-Simulation of unevenly illuminated texture.jpg

Next, I (a) applied a large radius Gaussian blur to the preceding image;
(b) applied a "levels" adjustment layer and brought the L and R endpoints in to give a full range of tonal values;
(c) inverted it; and,
(d) desaturated it.

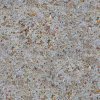
This gave me the resulting image (image #3).

layer0003-Inverted estimate of avgerage local illumination intensity.jpg

Note that it reflects the burning and dodging process quite well.

I then put that image in "Overlay" layer blending mode at 50% opacity over image #2 (the image to be fixed) and obtained the following result (image #4) after a bit of tweaking the opacity and blendIF sliders.

layer0004-Result of process to even illumination.jpg

As you can see, the above process has just about completely eliminated the simulated hot spot and shadow area.

In your situation, I would take one image of the background without any clothing present. Develop the above overlay layer for it, and then apply it to the background area on all of the images with clothing.

HTH,

Tom M

PS - FYI, for a long time, I experimented using Topaz Adjust and Topaz Details to even out illumination. I was never particularly happy with the results, and eventually went back to this method, one I've been using for at least a decade.
 
PPS - If you don't feel like going through all of the above, or can't do so because you have no reference image without clothing present, here's a very simple way to get a similar effect that often is all you need:

Completely flood the background area in each image with an appropriate solid gray. Texturize it by overlaying it with a bit of noise or a texture. You're done! It' ain't perfect, but it often is entirely adequate.

:-)

T
 
Here's a quick and dirty example of using the 2nd method I described, flooding the background with a grainy gray. Obviously, one can (and should) play with the edges to get whatever shadowing you want, as well as adjust the gray level and amount of grain as you think appropriate.

T
 

Attachments

  • example_of_product_shot_with_uneven_bkgnd-acr-ps04b_sRGB_8bpc_698px_hi_compare_gif_animation-01.gif
    example_of_product_shot_with_uneven_bkgnd-acr-ps04b_sRGB_8bpc_698px_hi_compare_gif_animation-01.gif
    198.5 KB · Views: 26

Back
Top